Paths are capable of a whole lot in GIMP. For now, I'll just be showing you the most basic; creating paths, converting text to a path, and 'stroking' paths to get pattern effects.
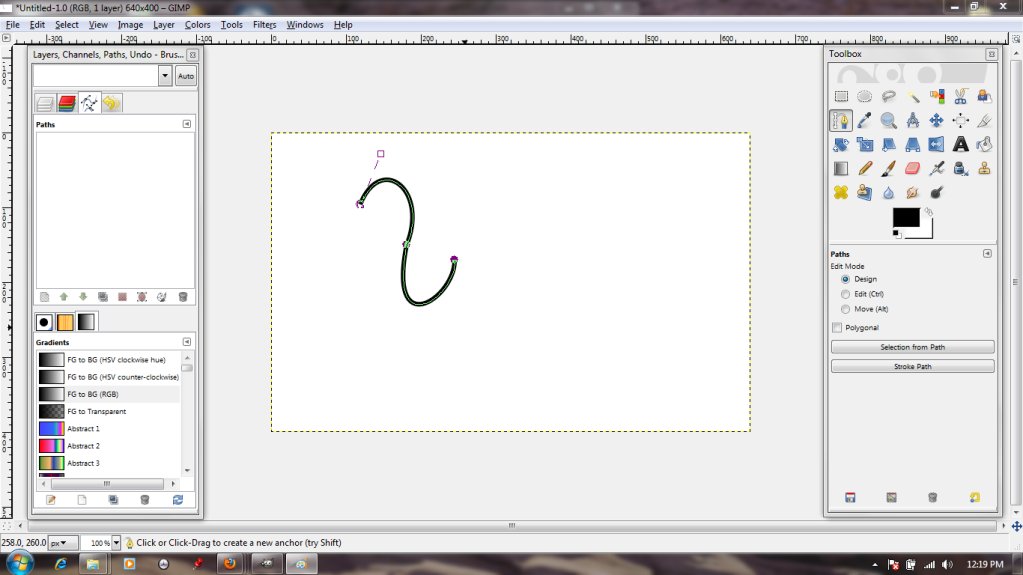
First things first, I need to select the Path tool from the Toolbox. It's the one that features the tip of a fountain pen. When I left-click it on my canvas, a dot appears; this is the first anchor point.
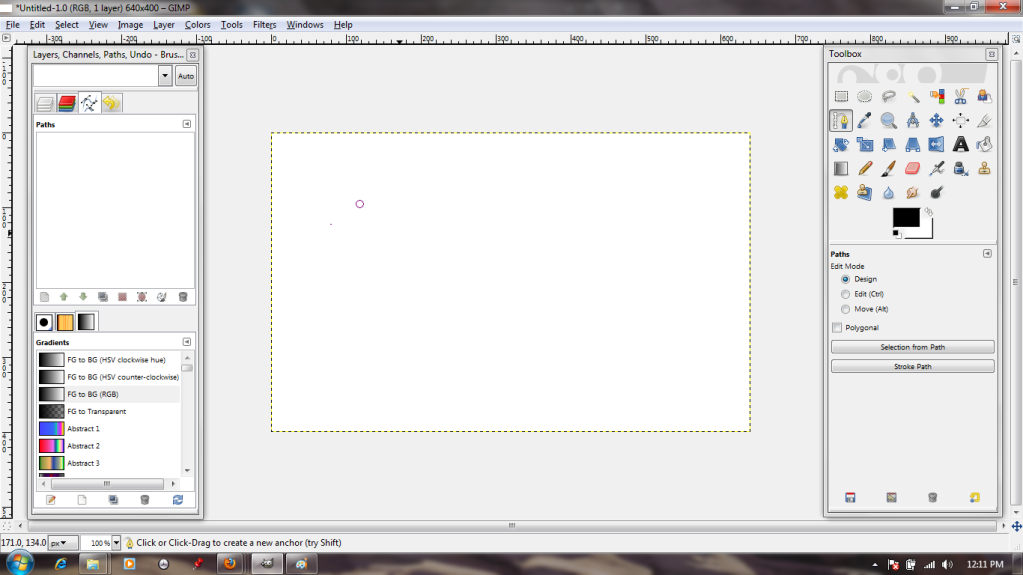
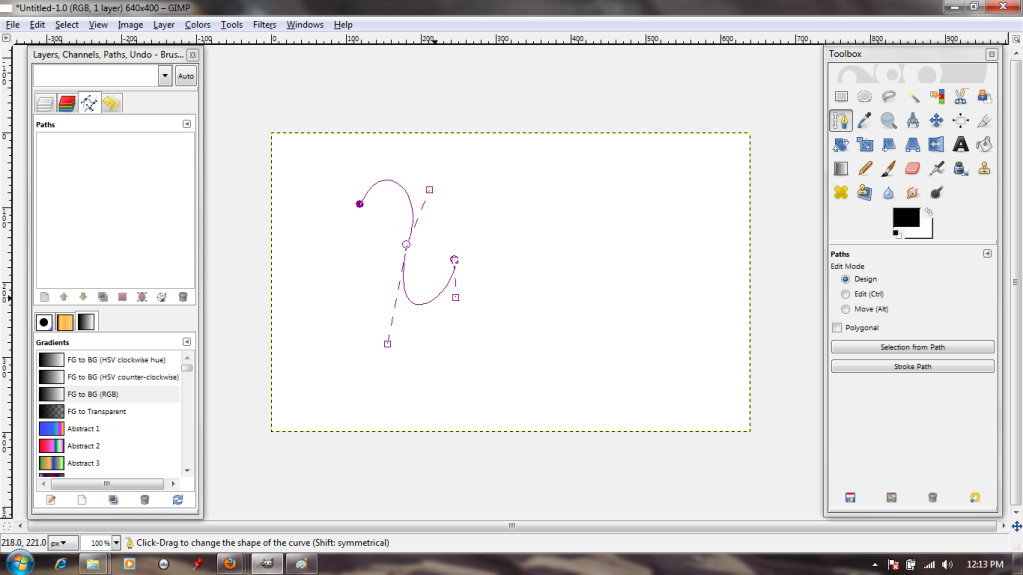
By clicking again and again, I make a path. The active dot--that is, the one I'm manipulating at any given moment--is clear with a purple outline, while the quiescent dots are solid purple.
I can manipulate the lines that comprise the path. Either by grasping them and stretching or by using the 'handles' at the anchors, it's possible to create any curve imaginable.
Now, the path is well and good, but I want to add effects to it. We'll do this by "stroking." I access the stroke dialogue through the menu that pops up after I right-click on the image.
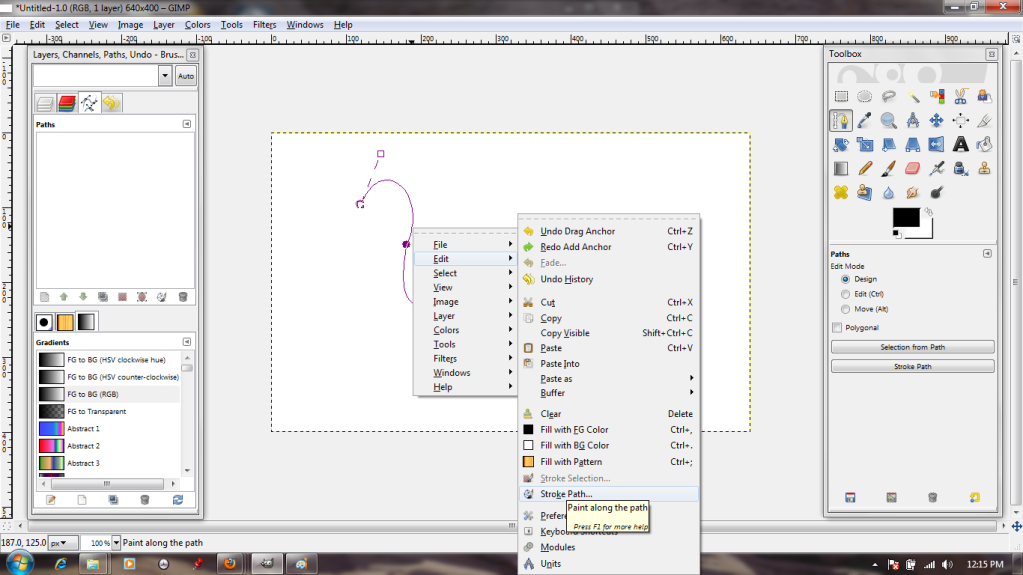
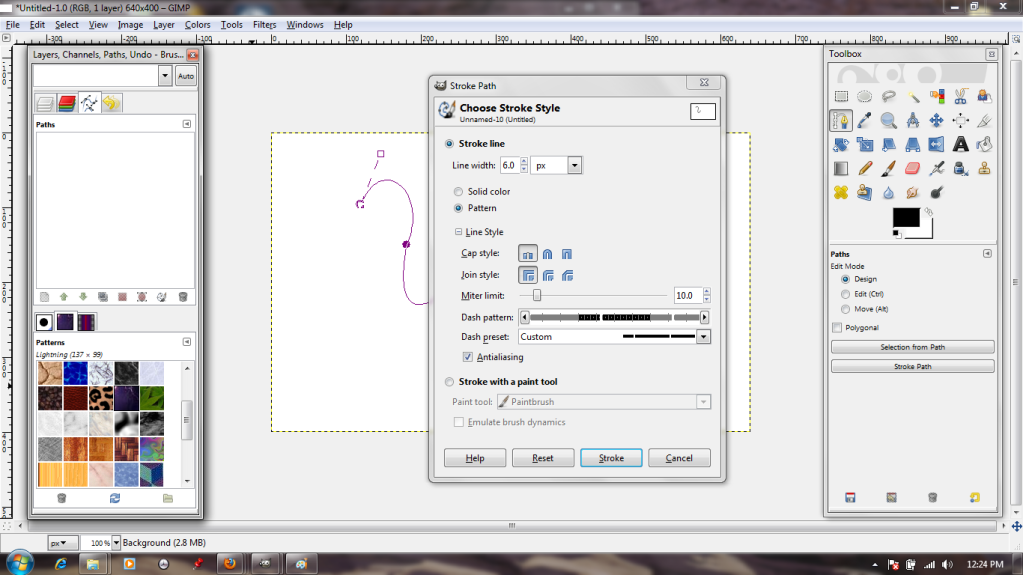
The dialogue is pretty simple; solid or pattern, various paintbrush effects, options to make the resulting line dotted. I'll go with the default, just to see what that gets me.
...A big, thick, plain line in the selected foreground color. Not exactly exciting, so I Undo.
Back in the dialogue box, I choose to stroke it with a pattern; in this case, a pretty blue one. I also choose a frequency for breaks in my line, so that it will be dotted.
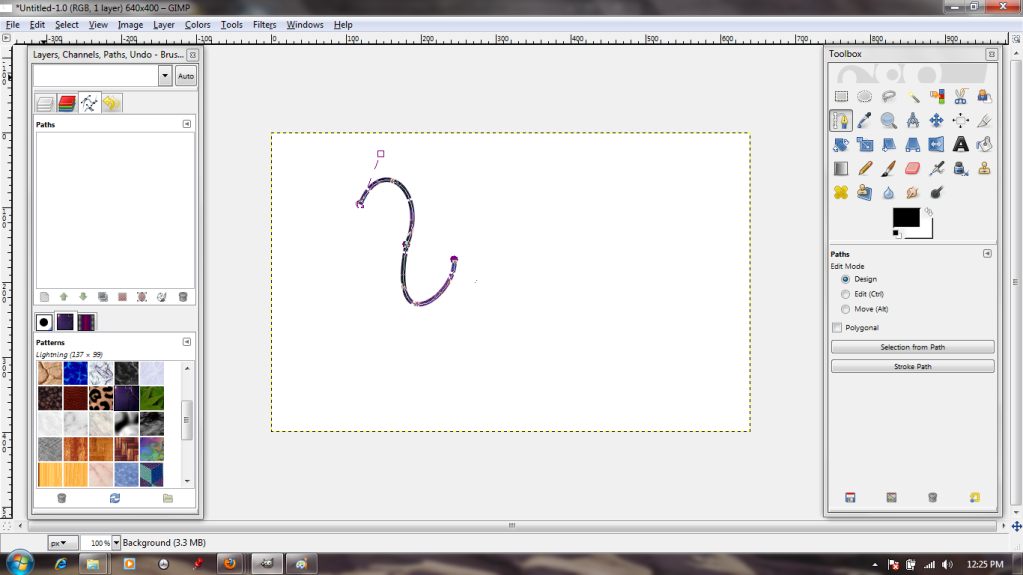
That's a bit more interesting!
But suppose I want to add that kind of effect to text?
Well, to start with, I will need to choose the Text tool and a font.
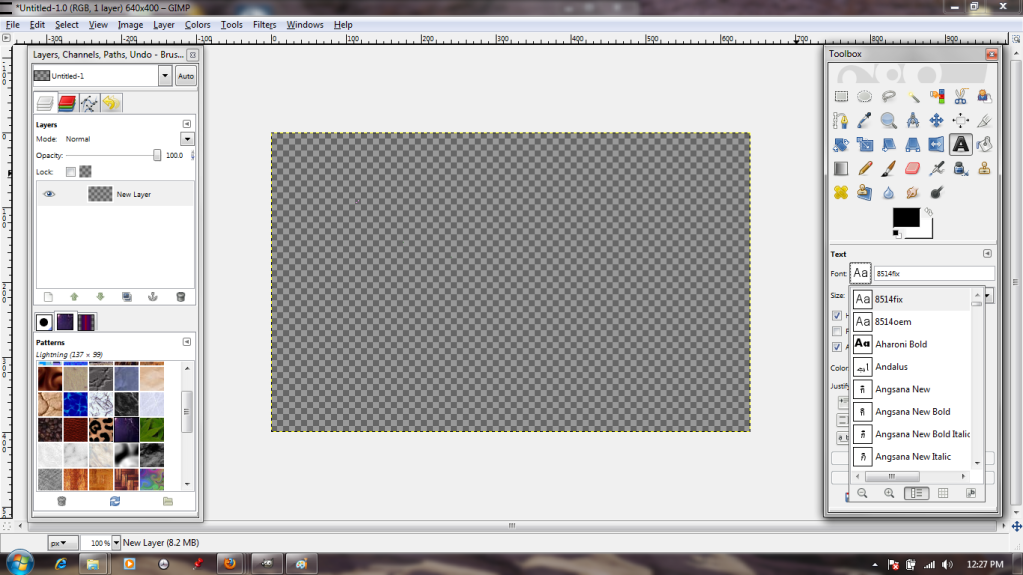
The typing dialogue box is pretty standard, if somewhat lacking in alignment options. Oh well. I put in a bit of filler text anyway, then click on the "Path From Text" button (highlighted in blue) to make the text itself into a shiny new path.
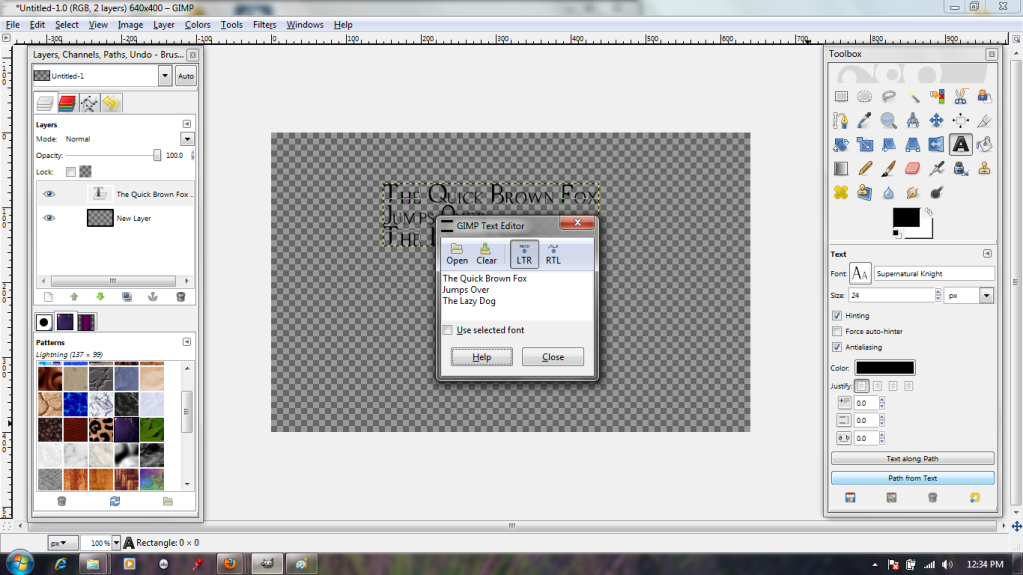
Back in the stroke dialogue, I specify that it should stroke it quite narrowly (1 pixel). This is because the font is quite fine-lined, and it could easily become illegible if it were stroked thickly.
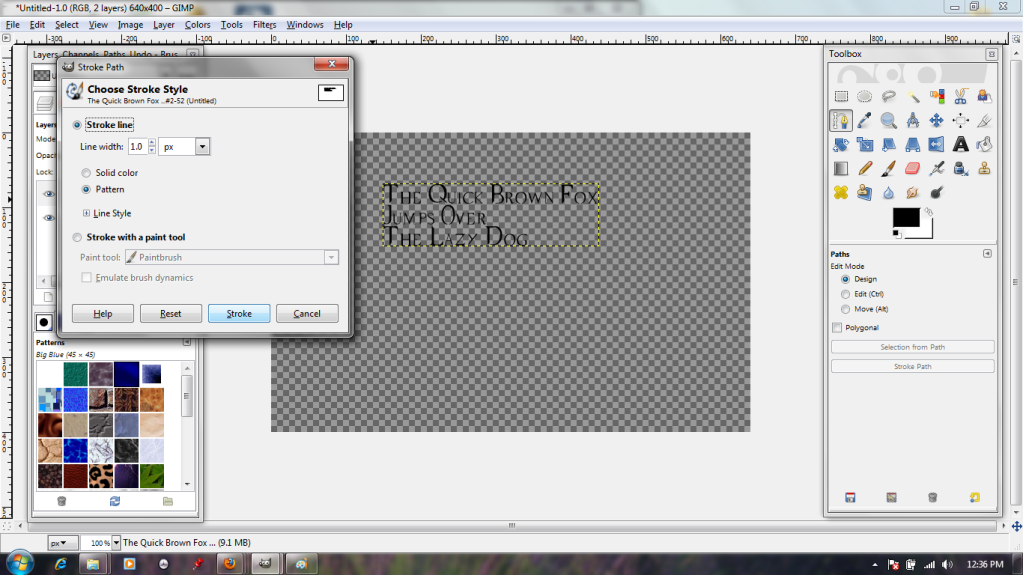
And here we are; pretty, ripply blue text.
There will be more on paths next week!
Sunday, March 11, 2012
Friday, March 2, 2012
Let's Try GIMP! Lesson 4: I Use Filters Now. Filters are COOL.
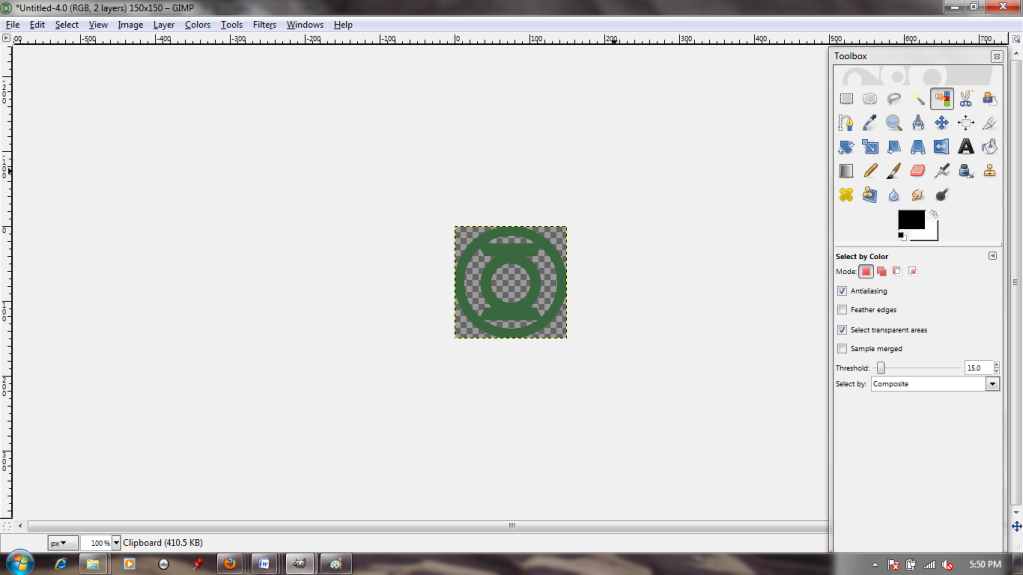
Another day, another insignia. I had to do the same color-select/paste thing with this as I did with the last one; in the interests of saving space, we'll skip right to the point where I paste it in as a new layer in a new file. You know the drill.
Looks a bit...drab, doesn't it? :( Ah, well. This is getting tough. I want to do something really cool, but my ambitions have outpaced my skills. If only there were some sort of tools that automatically create sophisticated effects...
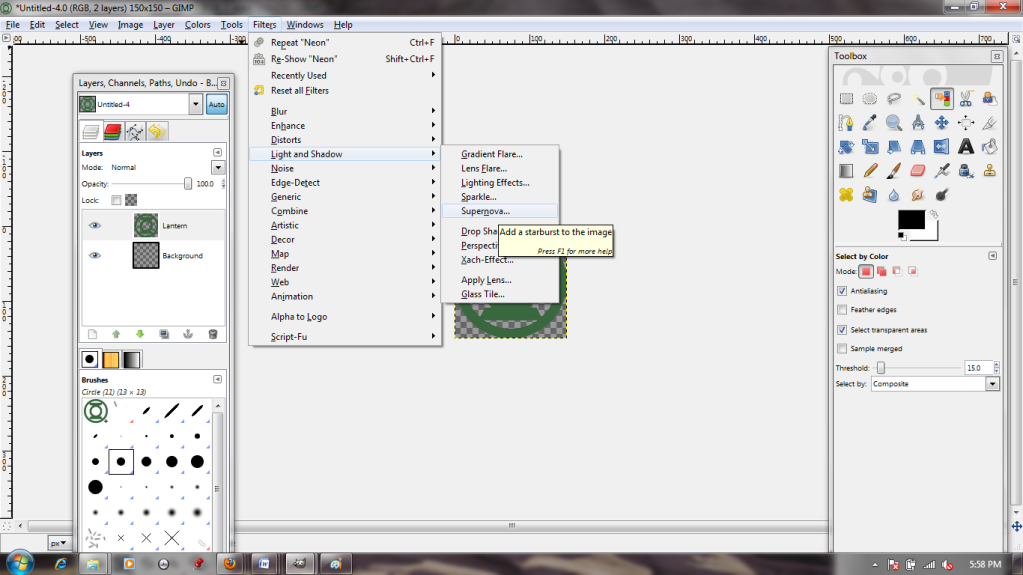
Ooh, filters! "Supernova" sounds fancy!
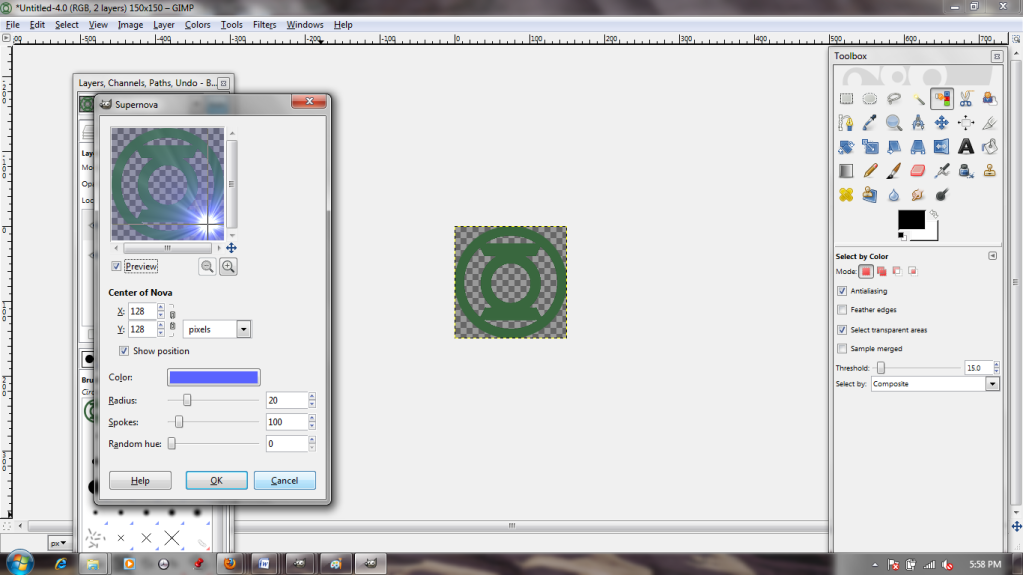
Ew. Well, that's...less than ideal. It would probably be pretty useful if I wanted to make something look shiny, though. Good thing the preview window lets me have a sneak peek! I'm just going to hit cancel right now, though. I mean, it could be a lot worse; I could have...
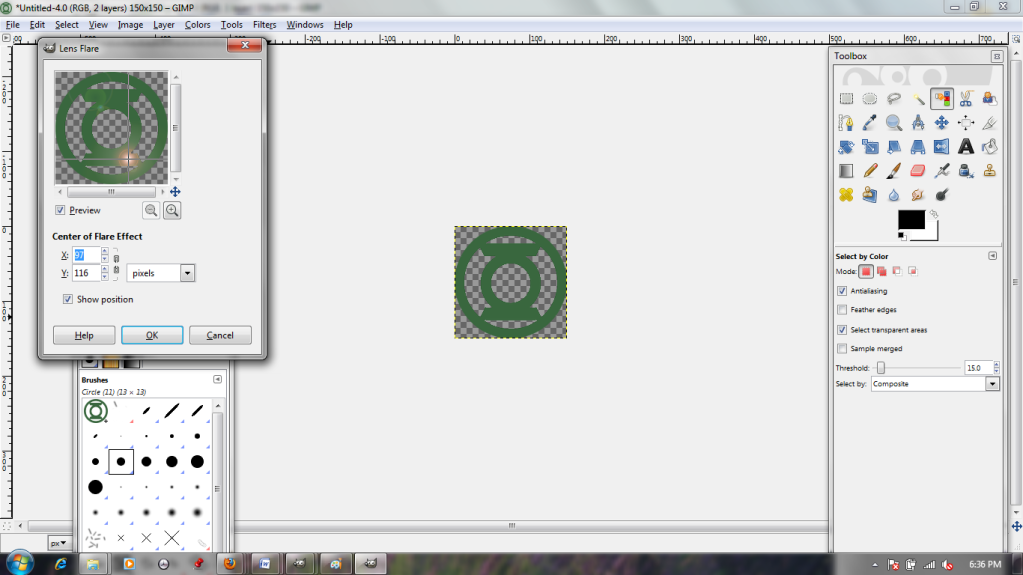
Lens flare!? No, I don't want this to look like an Abrams movie (although the dialogue does allow me to move the "light" around with my cursor, which is interesting). Cancel!
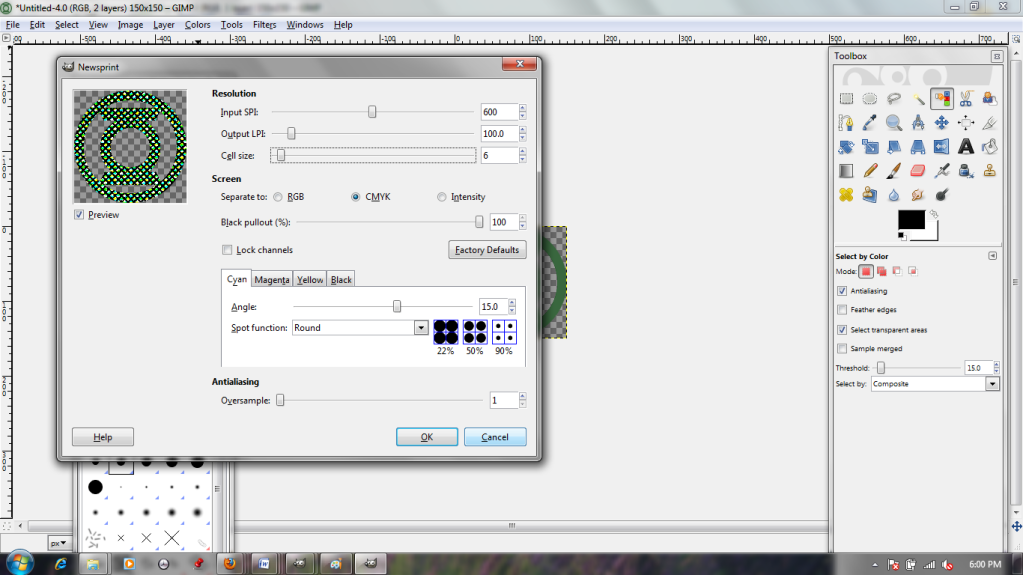
Maybe I should carry on with my comic book theme. The Newsprint filter looks interesting, and the sliders let me adjust the dot size up and down, but it's a bit gritty for my taste.
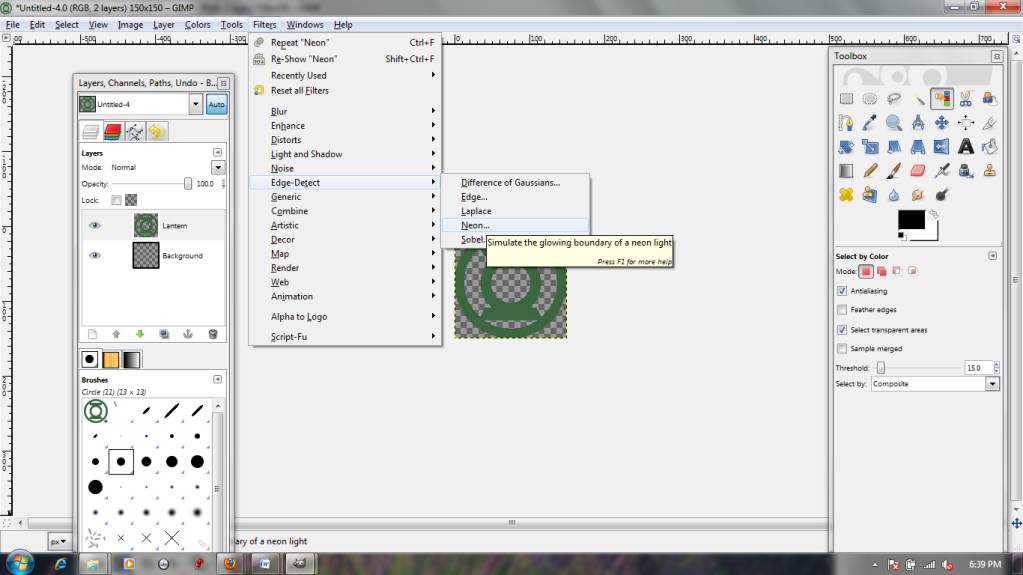
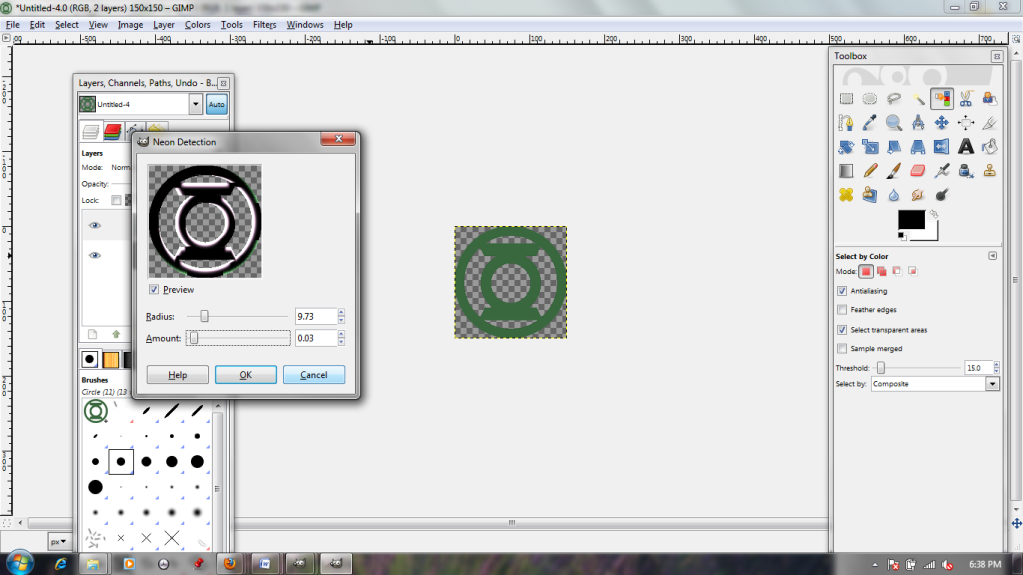
"Edge Detect" sounds as though it sharpens images, and the "Neon" option is interesting. The shiny edge makes it look quite 3-D. It's a bit dark, though, regardless of the name.
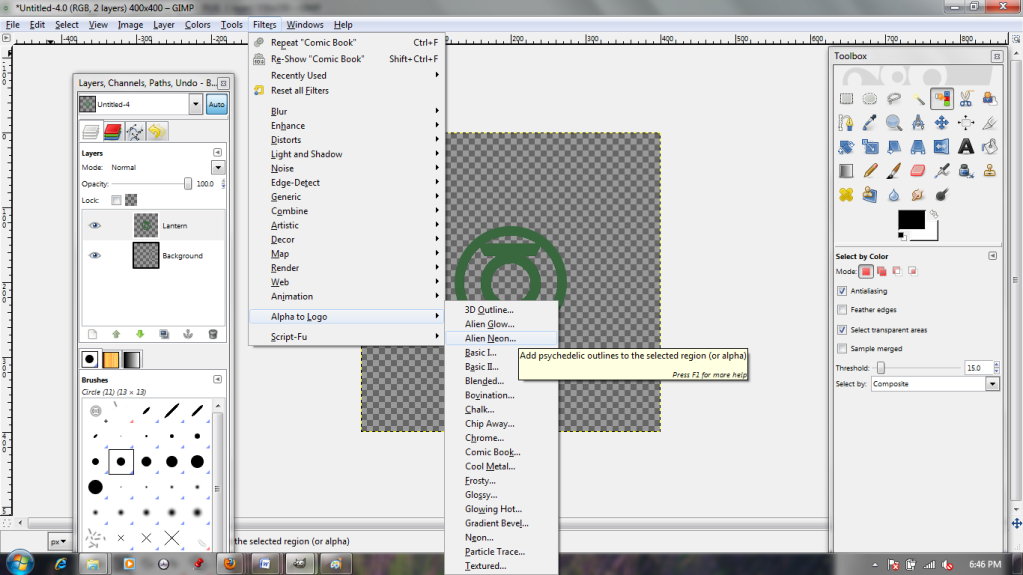
The most interesting options by far are in the "Alpha to Logo" section; I think I'll continue with my neon theme by choosing "Alien Neon." It lets me choose a color and a number of bands.
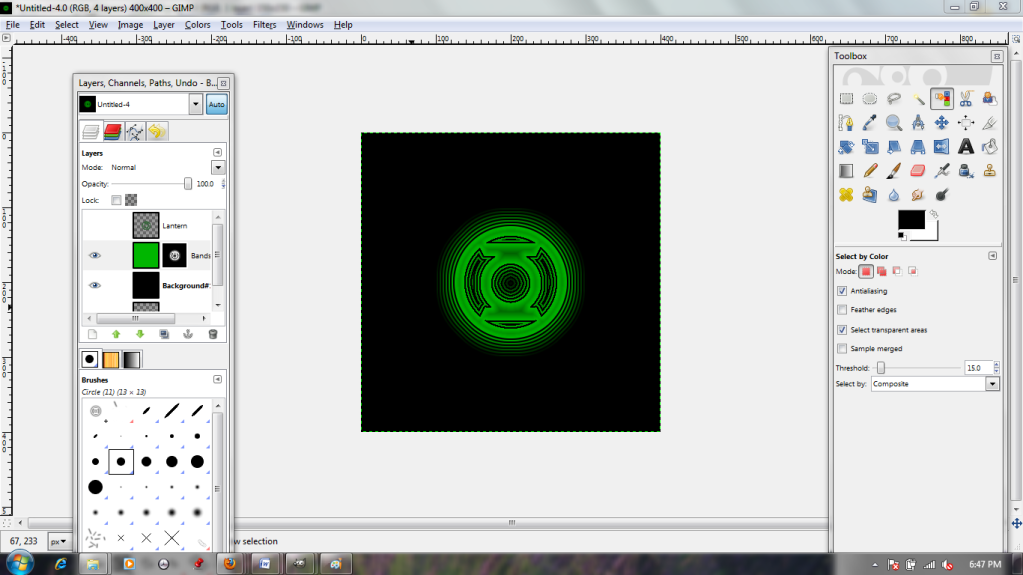
Wow! This filter actually rendered a new background layer in black AND a pre-masked layer in bright green! Best of all, my original is still there (invisible up top) in case I should change my mind.
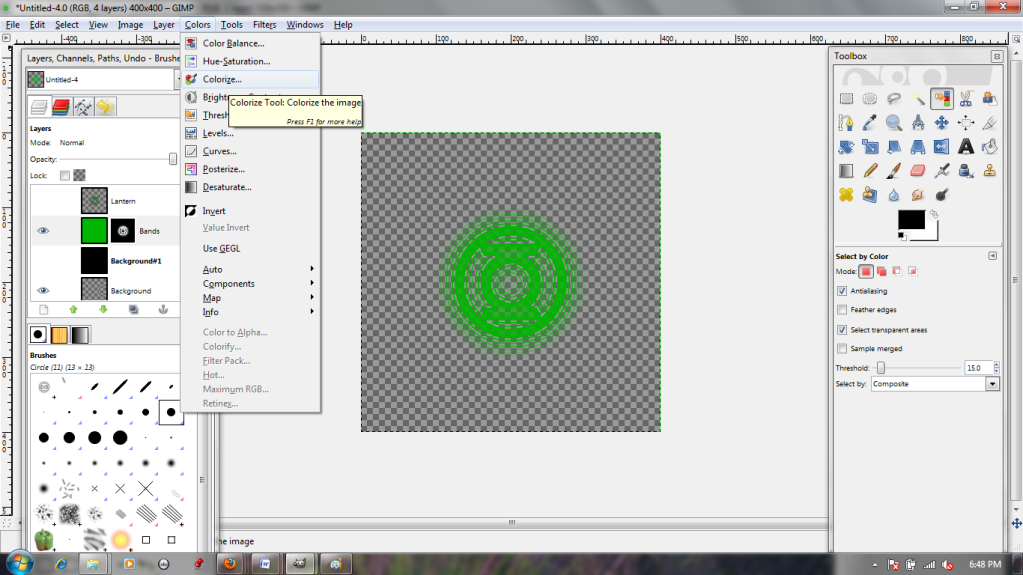
But on second thought, I don't like the bright green. "Colorize" will fix that.
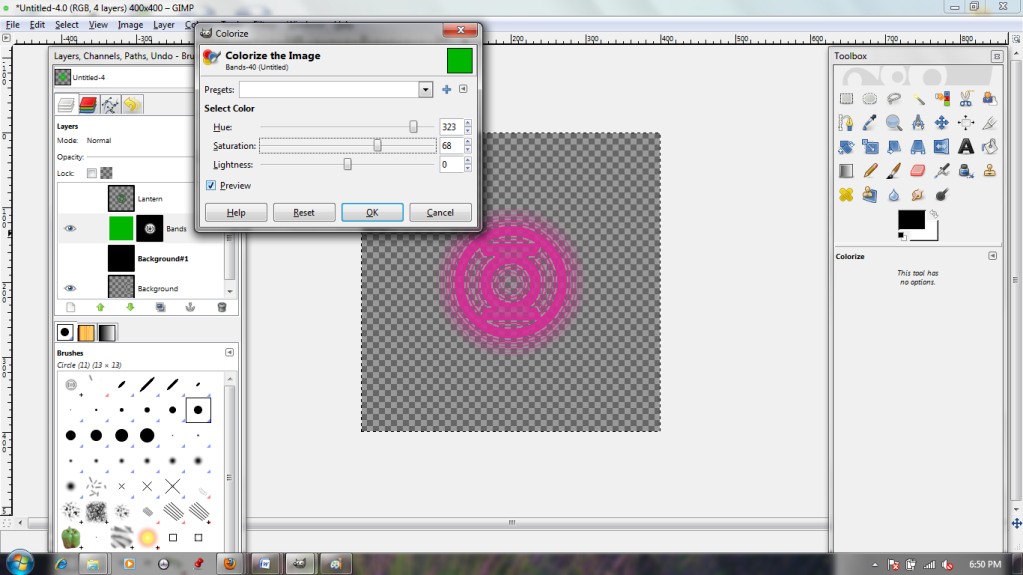
The sliders in the dialogue box let me toy with the layer's color. I can go from pink...
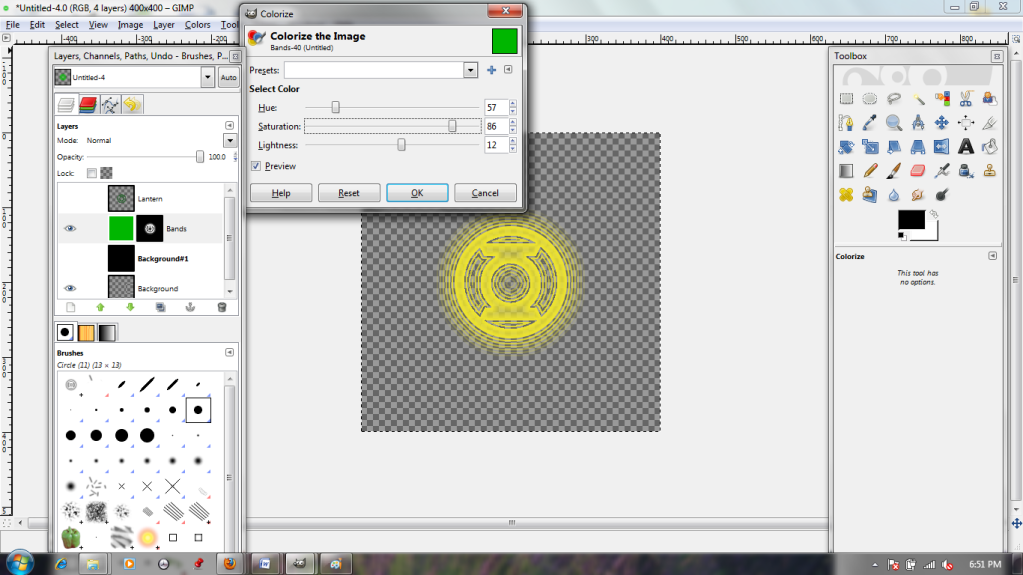
...to yellow in just a few clicks!
Filters can be really helpful for getting an effect that you can't do by yourself.
Looks a bit...drab, doesn't it? :( Ah, well. This is getting tough. I want to do something really cool, but my ambitions have outpaced my skills. If only there were some sort of tools that automatically create sophisticated effects...
Ooh, filters! "Supernova" sounds fancy!
Ew. Well, that's...less than ideal. It would probably be pretty useful if I wanted to make something look shiny, though. Good thing the preview window lets me have a sneak peek! I'm just going to hit cancel right now, though. I mean, it could be a lot worse; I could have...
Lens flare!? No, I don't want this to look like an Abrams movie (although the dialogue does allow me to move the "light" around with my cursor, which is interesting). Cancel!
Maybe I should carry on with my comic book theme. The Newsprint filter looks interesting, and the sliders let me adjust the dot size up and down, but it's a bit gritty for my taste.
"Edge Detect" sounds as though it sharpens images, and the "Neon" option is interesting. The shiny edge makes it look quite 3-D. It's a bit dark, though, regardless of the name.
The most interesting options by far are in the "Alpha to Logo" section; I think I'll continue with my neon theme by choosing "Alien Neon." It lets me choose a color and a number of bands.
Wow! This filter actually rendered a new background layer in black AND a pre-masked layer in bright green! Best of all, my original is still there (invisible up top) in case I should change my mind.
But on second thought, I don't like the bright green. "Colorize" will fix that.
The sliders in the dialogue box let me toy with the layer's color. I can go from pink...
...to yellow in just a few clicks!
Filters can be really helpful for getting an effect that you can't do by yourself.
Saturday, February 25, 2012
Let's Try GIMP! Lesson 3: Opening AI Files, Copy/Pasting as Layer, Clone Tool, and Warping Images
Oof. I had to work on Friday night, and so this blog update is late. To make up for it, I've gone extra-long and tried out several tools and techniques.
Because last week's escapade with Iron Man went so well, I've decided I'd like to mess with Captain America next. I'm going to be adding a new insignia to him. I found a lovely vector graphic made by someone online, and it is exactly what I need.
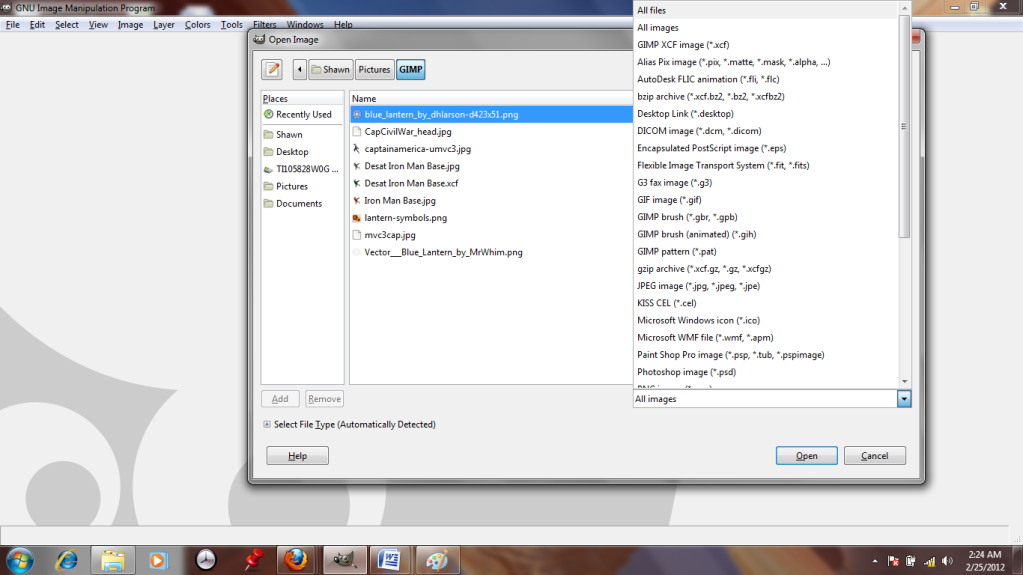
Unfortunately, they made it in Adobe Illustrator, and GIMP doesn't like .ai files. I can't even see it in the "open" dialogue. :-(
But if I change the setting from "All Images" to "All Files"...
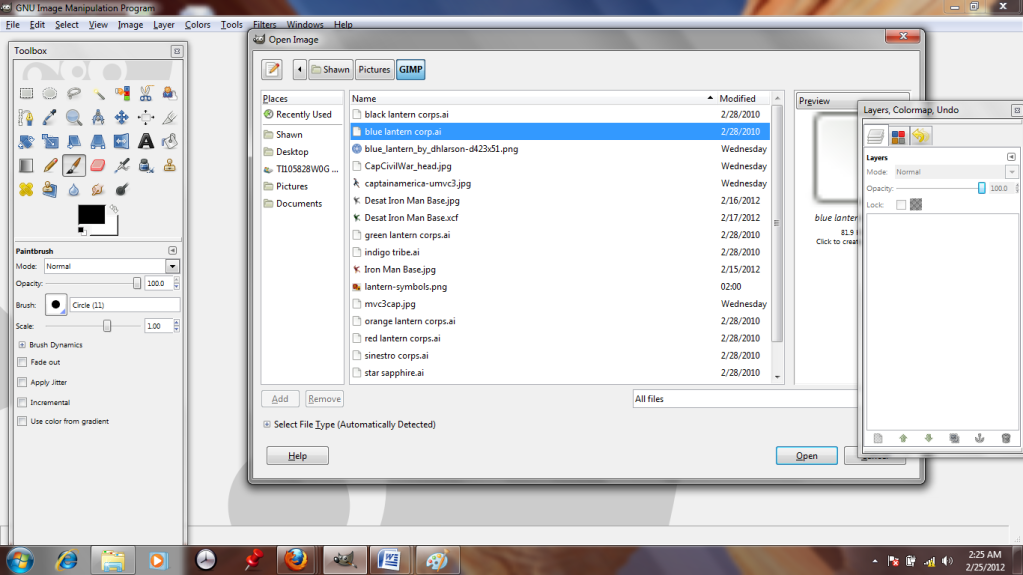
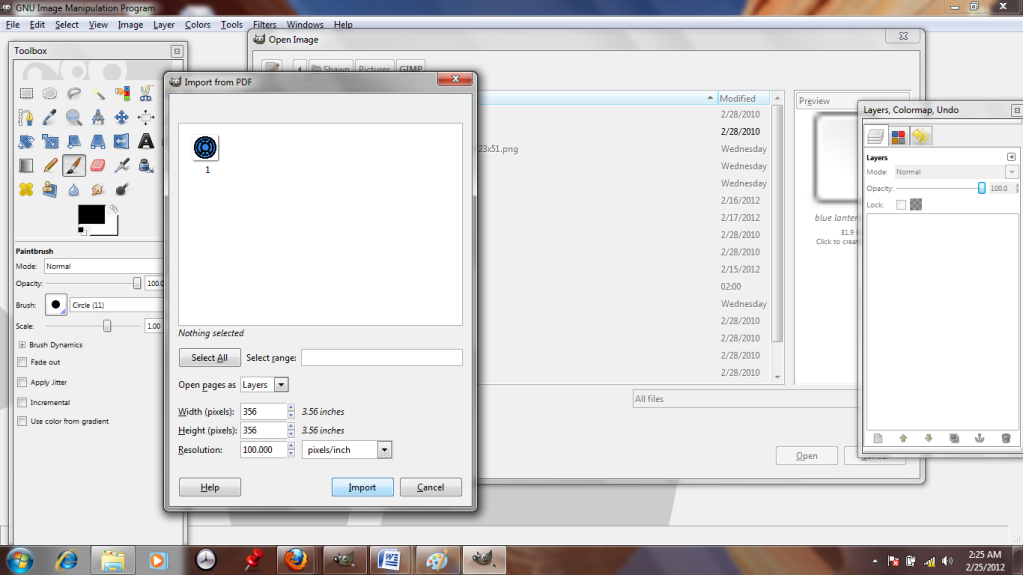
It suddenly appears. GIMP can read it like a .pdf, as long as I convert it. Hooray!
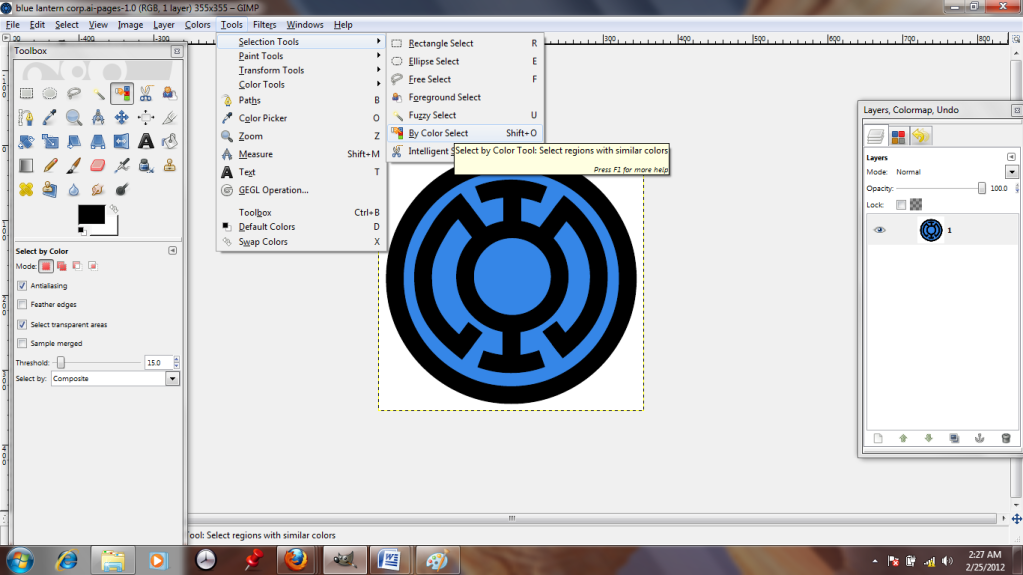
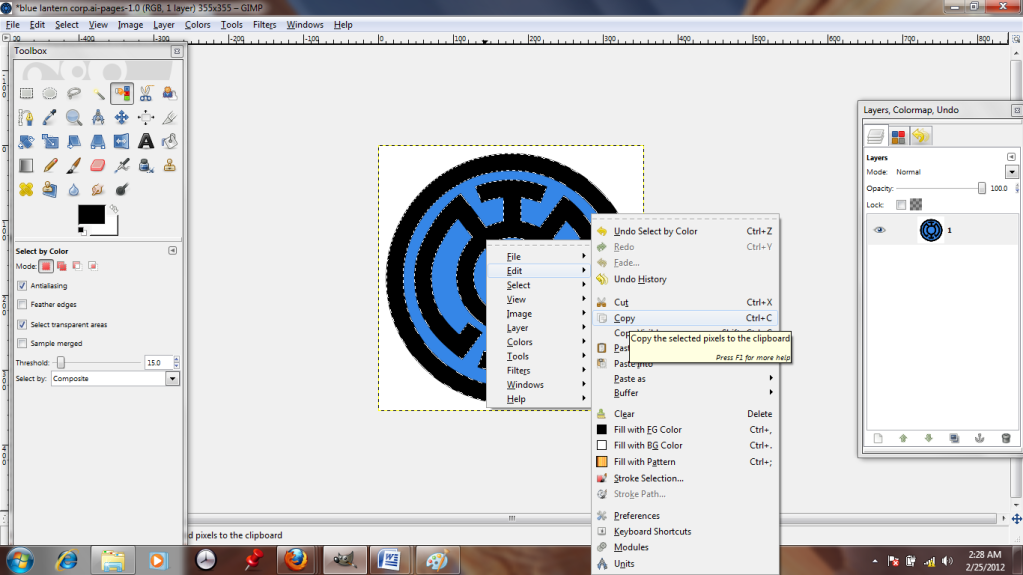
It's a nice image, but I don't want the whole thing, just the black parts, so I'm going to use the "color select" tool to pick those out. Just click it, then click the black regions.
The selected regions are surrounded by white dotted lines. I right-click and copy the parts I want; they're now stored in my clipboard.
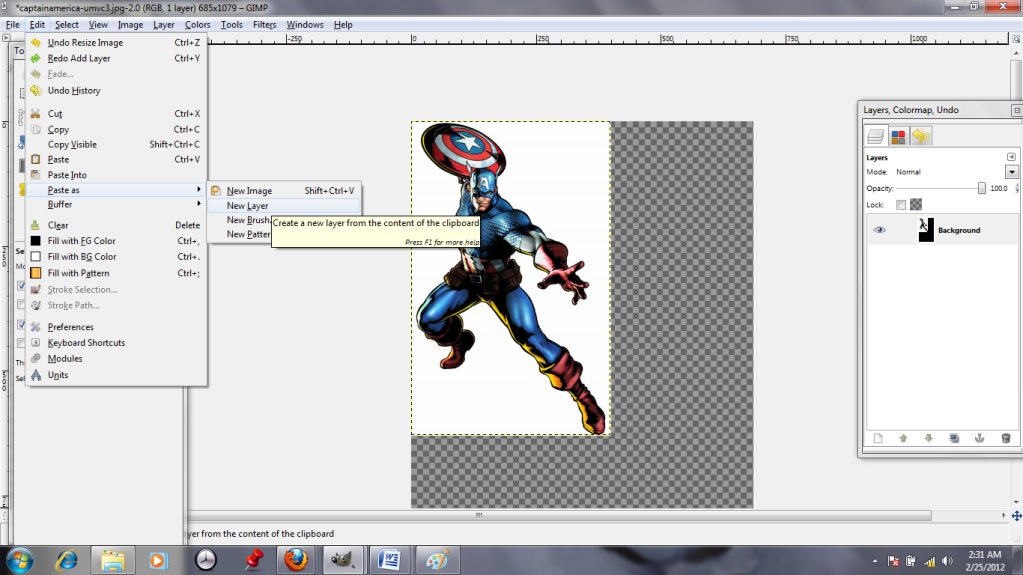
Captain America apparently took posing lessons from his good friend Iron Man, I notice! I'm going to paste the black outline in as a New Layer.
Pasting it as a new layer ensures that I can do whatever I want to the insignia without harming Cap, who is my background layer.
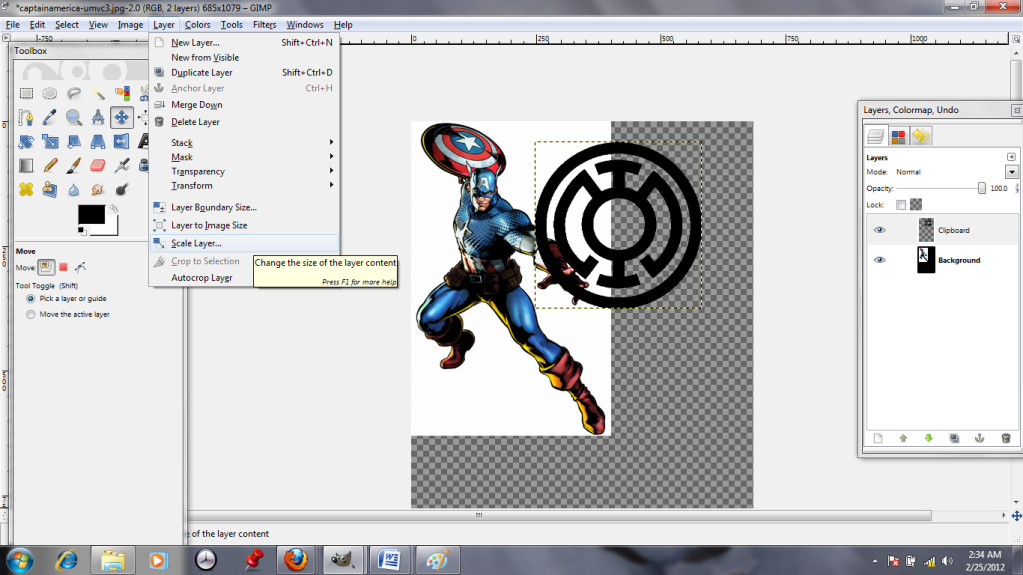
It's pasted in, all right, but it's enormous! The "Scale Layer" tool lets me toggle the size up and down...
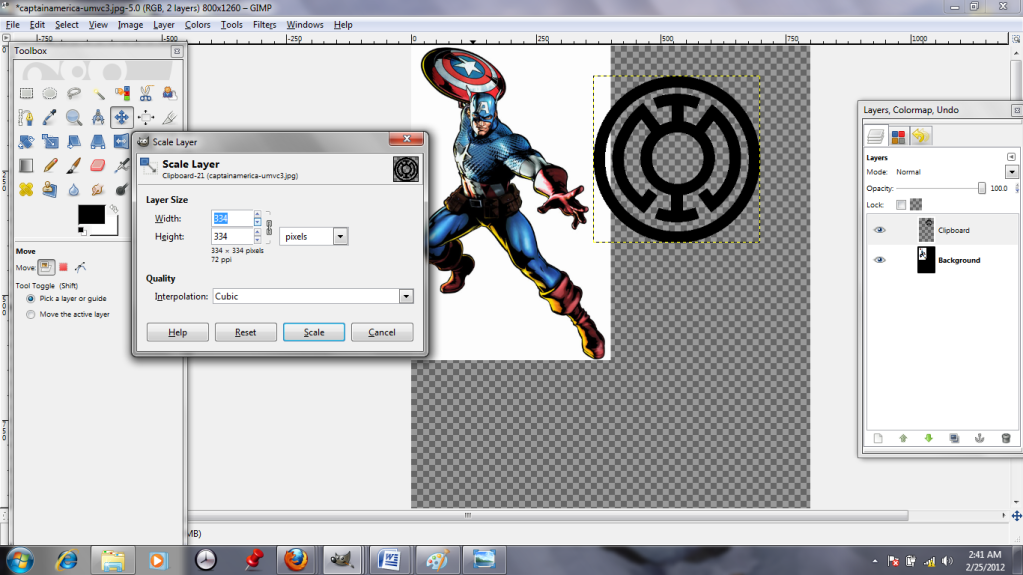
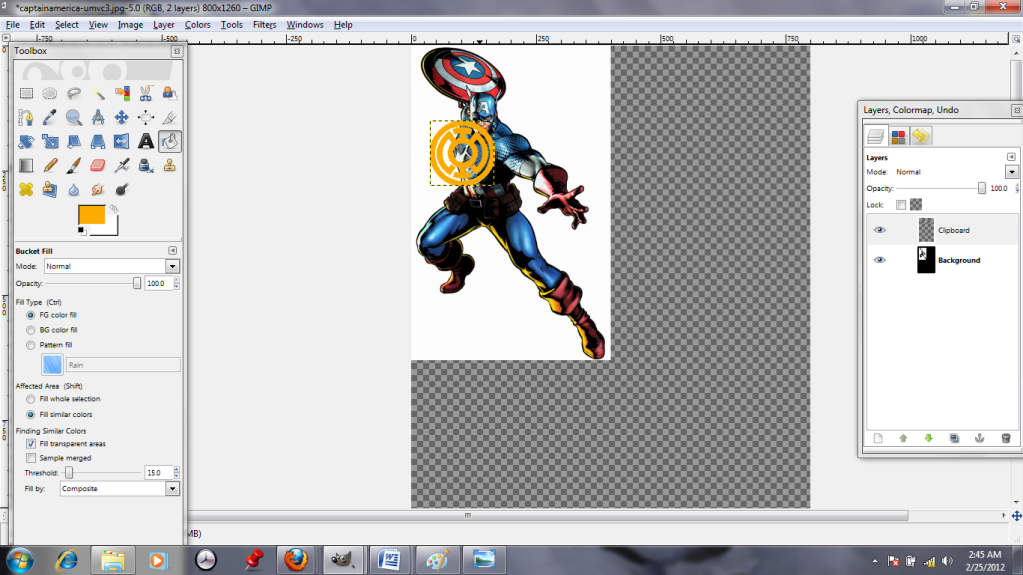
...I just play with it until it looks about right. (The insignia will also be orange from now on, for the sake of visibility.)
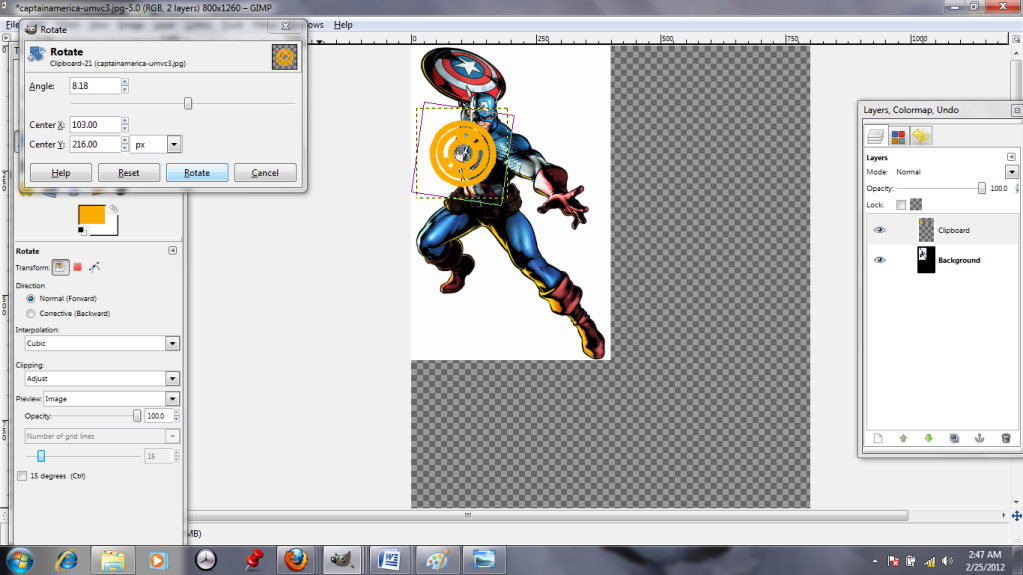
The "Rotate" tool, 3 down on the far left of the toolbox, allows me to twist the layer like I'm spinning a record. This is helpful, because Cap's chest is angled. I use his star as a guide to eyeball the appropriate tilt. Then I scoot that layer over and select the background; I need to do some cloning. Will humanity never learn from Reed Richards' mistakes!? (No, not that kind of cloning. I promise, no robot Thors.)
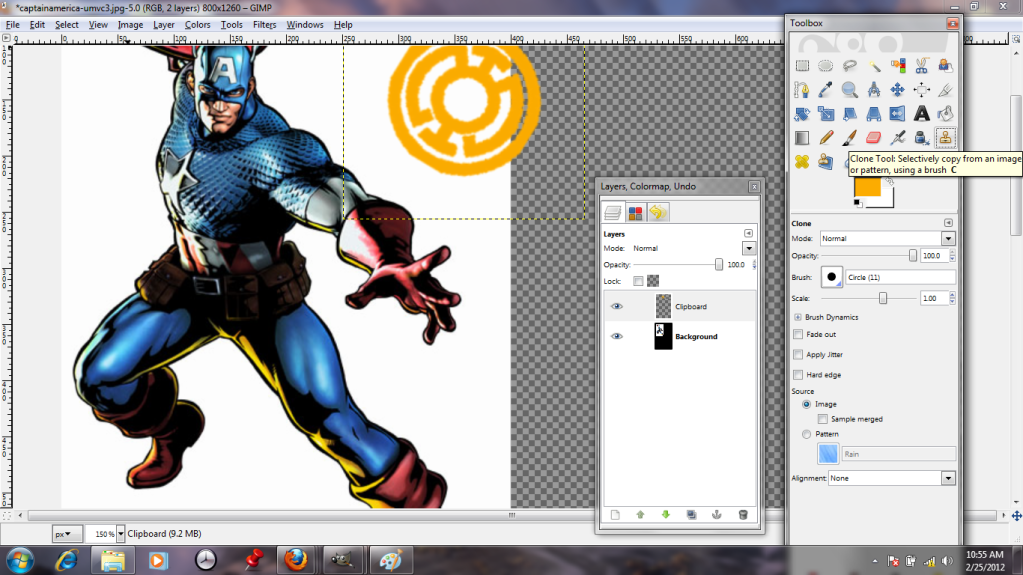
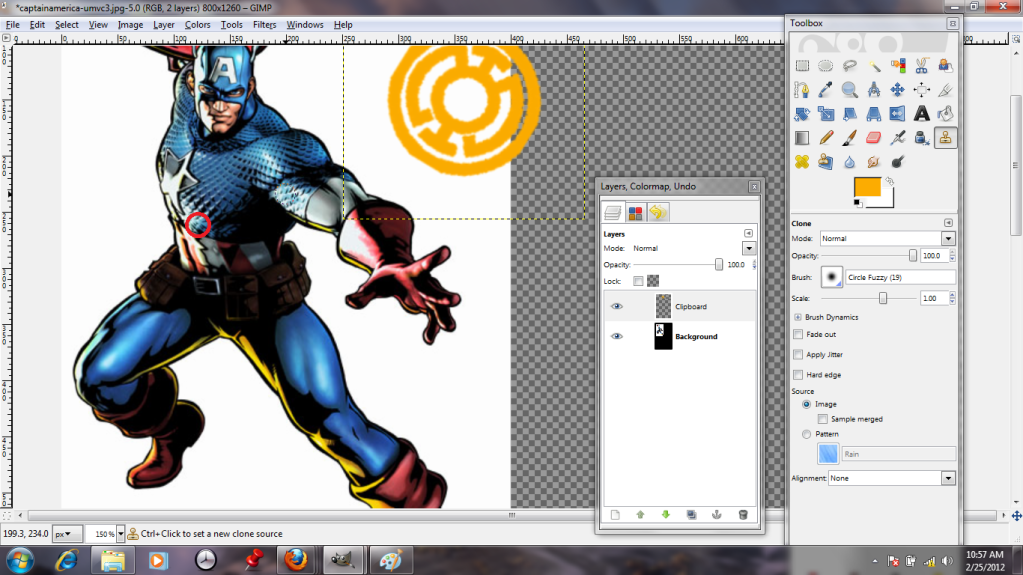
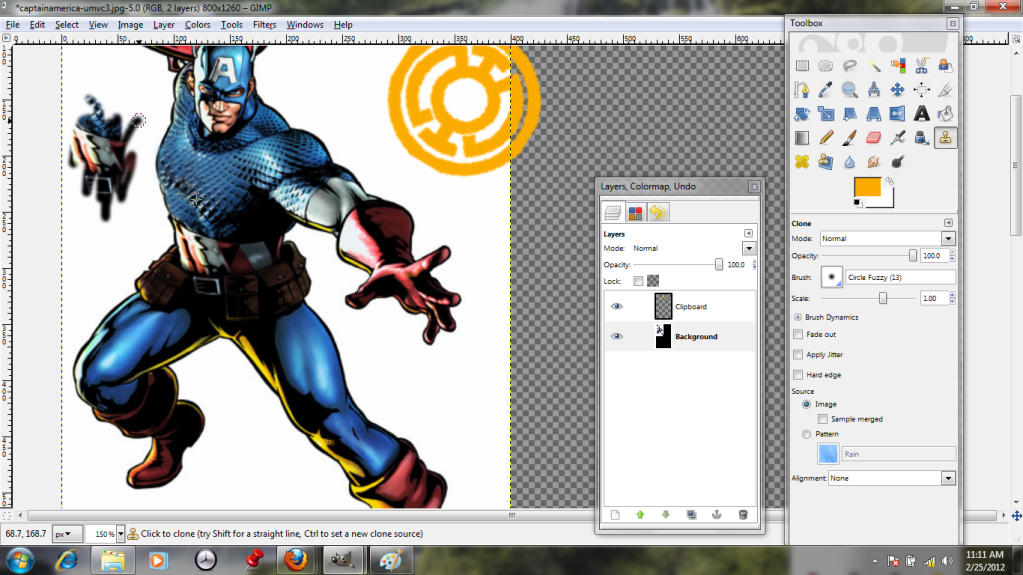
The "Clone" tool is pretty neat. It allows me to select one area (seen here with a red circle added,) and use that as a paintbrush. This way, I can hide Cap's star with cloned chain mail, as long as I am careful to pluck bits from regions that will reasonably match the light and shadow.
Here, we have his chest pretty much done; I've also added a scribble to dramatize what "Clone" really does.
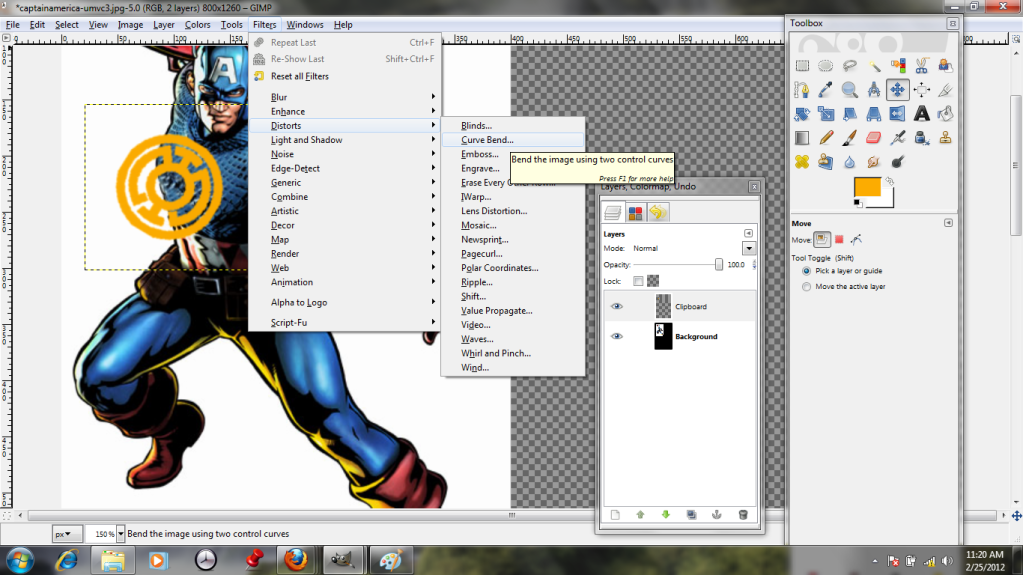
Unfortunately, tilting the insignia wasn't really enough to make it look like it conforms to the shape of his chest. It needs to curve and bend. Shockingly, the best tool for the job is the "Curve Bend" tool!
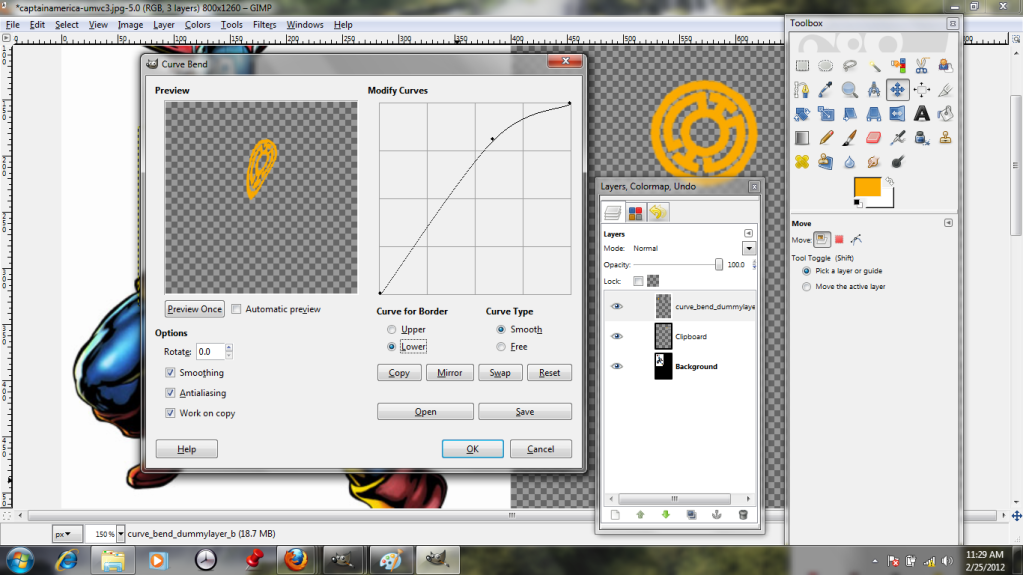
By playing with the curve in this dialogue, I can stretch and warp the layer like taffy until I get the shape I want. The preview allows me to see what I'm doing, and hopefully to avoid messing it up too much. I've also clicked the option to work with a copy, which means my original layer remains untouched.
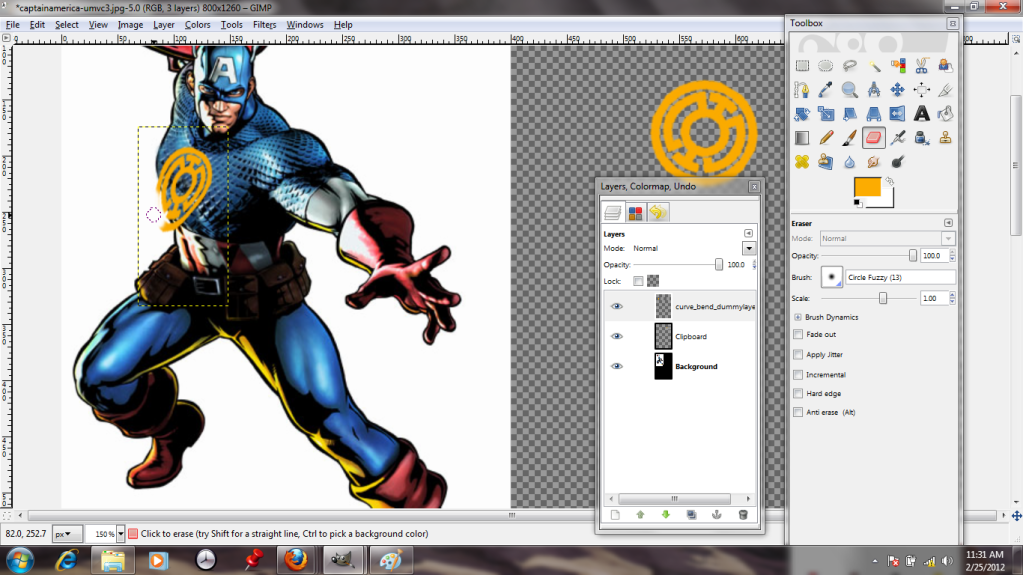
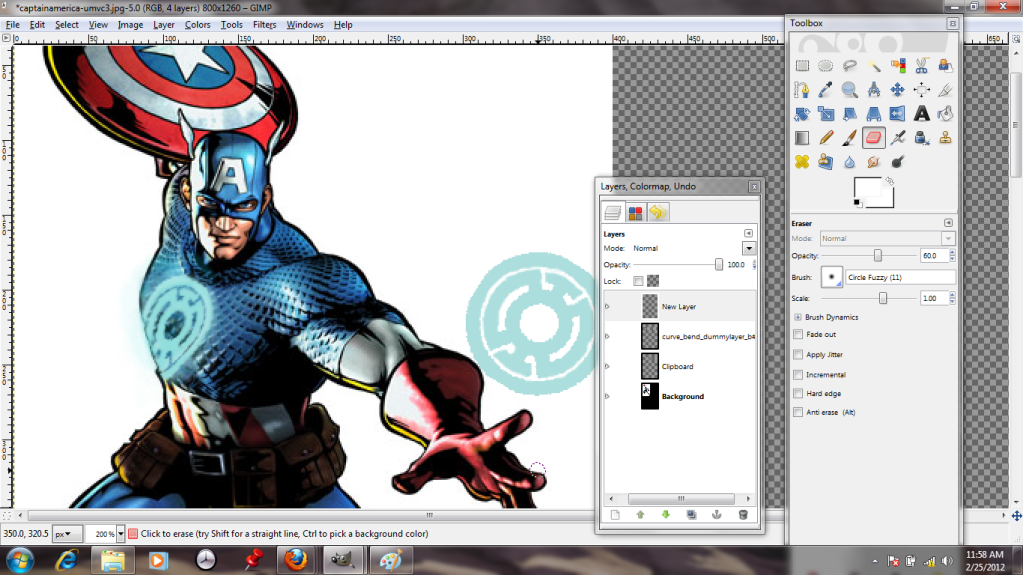
Et voila-- it looks more three-dimensional. I cheat and erase the bits that hang off his body, because "Curve Bend" can't extrapolate that there's a guy there and hide the bits that would be covered.
This is my correctly-colored version, with a bit of glow painted on to another new layer (the better to take it off later!)
Naturally, I save this as a GIMP file and exit.
Because last week's escapade with Iron Man went so well, I've decided I'd like to mess with Captain America next. I'm going to be adding a new insignia to him. I found a lovely vector graphic made by someone online, and it is exactly what I need.
Unfortunately, they made it in Adobe Illustrator, and GIMP doesn't like .ai files. I can't even see it in the "open" dialogue. :-(
But if I change the setting from "All Images" to "All Files"...
It suddenly appears. GIMP can read it like a .pdf, as long as I convert it. Hooray!
It's a nice image, but I don't want the whole thing, just the black parts, so I'm going to use the "color select" tool to pick those out. Just click it, then click the black regions.
The selected regions are surrounded by white dotted lines. I right-click and copy the parts I want; they're now stored in my clipboard.
Captain America apparently took posing lessons from his good friend Iron Man, I notice! I'm going to paste the black outline in as a New Layer.
Pasting it as a new layer ensures that I can do whatever I want to the insignia without harming Cap, who is my background layer.
It's pasted in, all right, but it's enormous! The "Scale Layer" tool lets me toggle the size up and down...
...I just play with it until it looks about right. (The insignia will also be orange from now on, for the sake of visibility.)
The "Rotate" tool, 3 down on the far left of the toolbox, allows me to twist the layer like I'm spinning a record. This is helpful, because Cap's chest is angled. I use his star as a guide to eyeball the appropriate tilt. Then I scoot that layer over and select the background; I need to do some cloning. Will humanity never learn from Reed Richards' mistakes!? (No, not that kind of cloning. I promise, no robot Thors.)
The "Clone" tool is pretty neat. It allows me to select one area (seen here with a red circle added,) and use that as a paintbrush. This way, I can hide Cap's star with cloned chain mail, as long as I am careful to pluck bits from regions that will reasonably match the light and shadow.
Unfortunately, tilting the insignia wasn't really enough to make it look like it conforms to the shape of his chest. It needs to curve and bend. Shockingly, the best tool for the job is the "Curve Bend" tool!
By playing with the curve in this dialogue, I can stretch and warp the layer like taffy until I get the shape I want. The preview allows me to see what I'm doing, and hopefully to avoid messing it up too much. I've also clicked the option to work with a copy, which means my original layer remains untouched.
Et voila-- it looks more three-dimensional. I cheat and erase the bits that hang off his body, because "Curve Bend" can't extrapolate that there's a guy there and hide the bits that would be covered.
This is my correctly-colored version, with a bit of glow painted on to another new layer (the better to take it off later!)
Naturally, I save this as a GIMP file and exit.
Friday, February 17, 2012
Let's Try GIMP! Lesson 2: Recolor Using Layer Masks
As you may have guessed, I'm a bit of an Avengers geek (the fake text in the last post just might be a tipoff.) However, I absolutely can't resist messing with things I like, so tonight I've decided to RUIN Iron Man's traditional color scheme. Please, no tears.
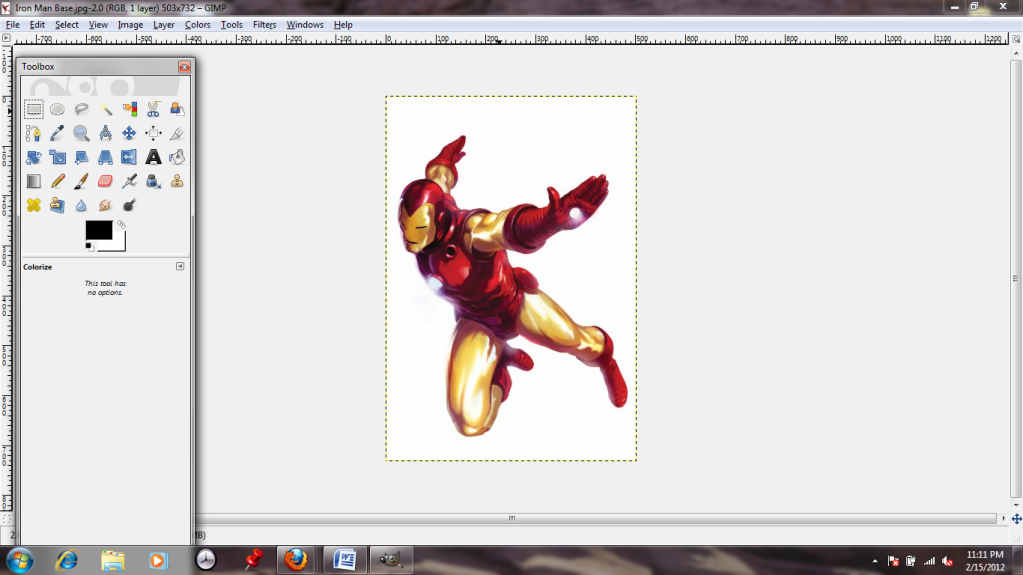
Here is Iron Man, looking just as he should. Very subtle, guy.
Not for long, though! I don't want to just paint over him, because that would be annoying and I have no artistic talent. If I did, I could draw my own darn superheroes.
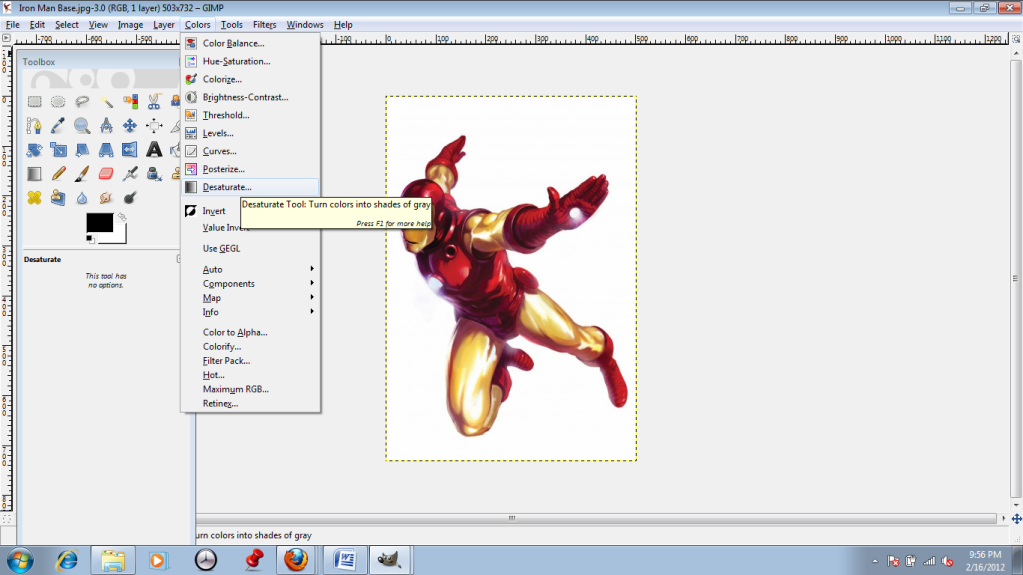
Instead, I'm going to desaturate him (turn the image black and white.) This option is located in the "Color" menu.
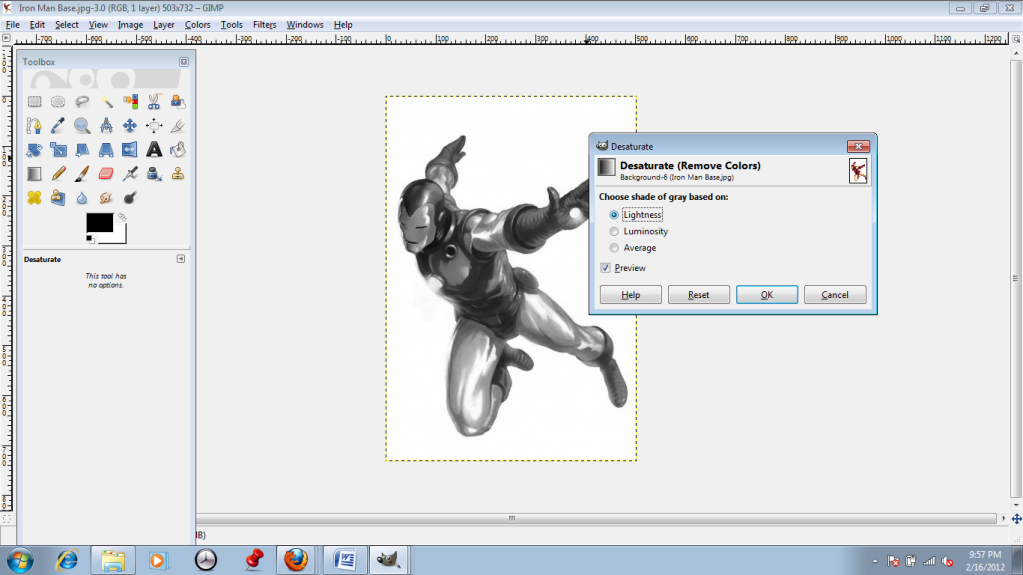
There are a few ways that GIMP can map the black and white; I choose to go with the Lightness option because it looks nice and sharp, and I don't want too much grey to interfere with the colors I put in later on.
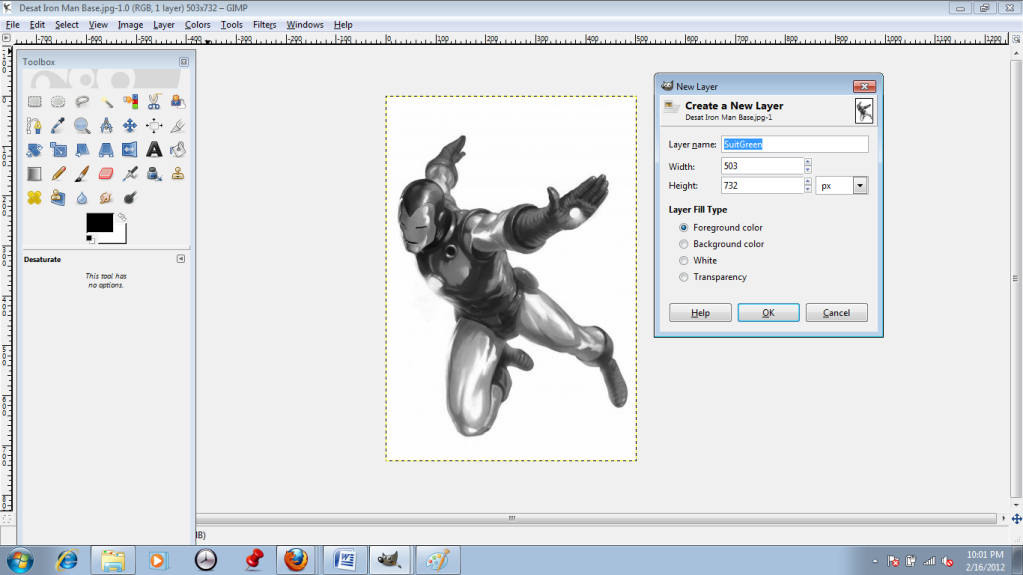
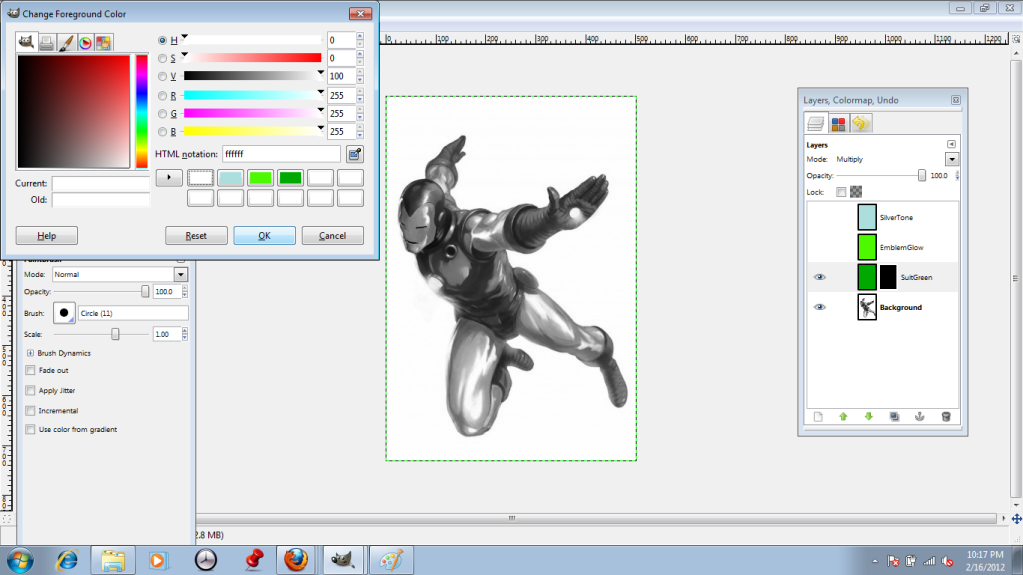
I want to change the image by adding three new colors, so I'll be adding three new layers. I give them appropriate names so I can remember which I'm messing with.
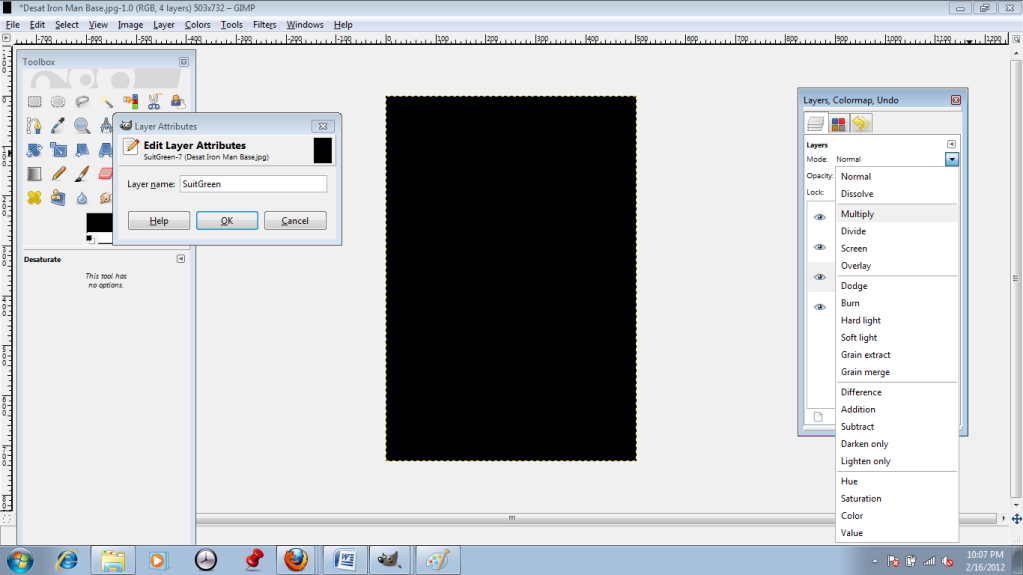
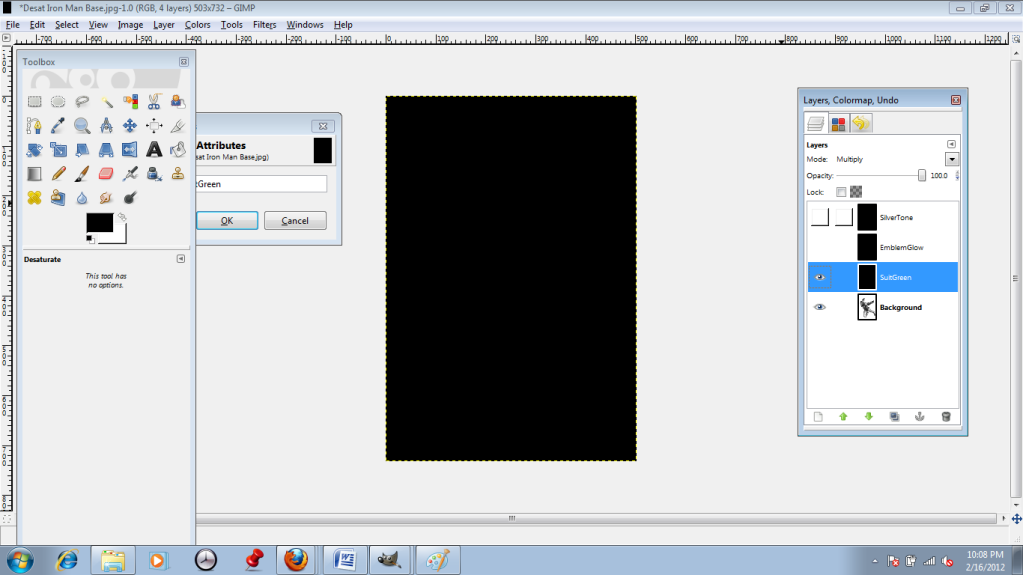
Yeah, that dead black emptiness, like the uncaring void of space? That's not what I want to see. I switch all of the layers over to the "Multiply" setting.
I also click on the little eyeball icons so that I can work on one layer at a time.
On "Multiply" the layers are kind of like sheets of colored cellophane laid over the image; they add color but are transparent. Obviously this doesn't help when they're black, but once I pick a bright green...
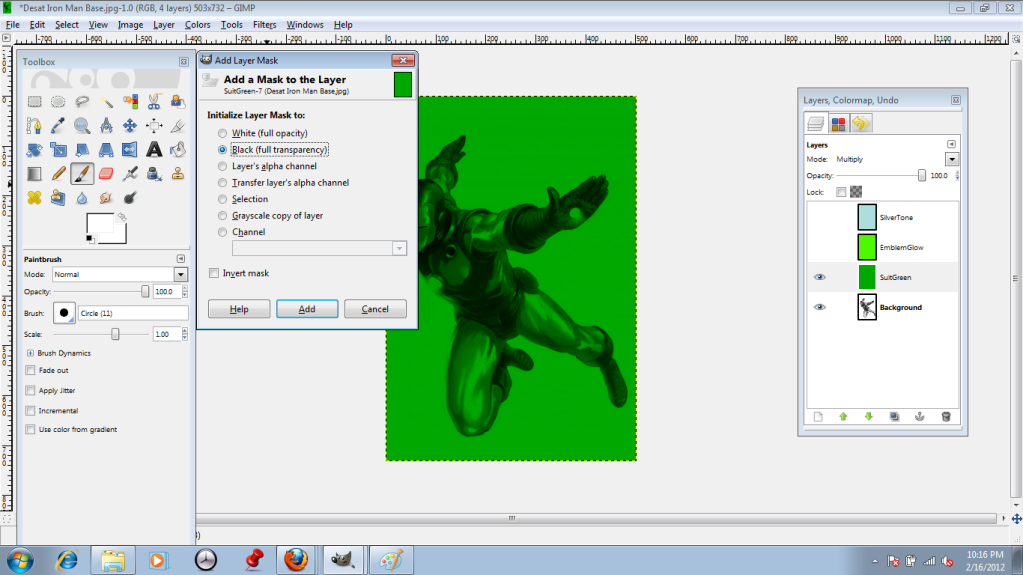
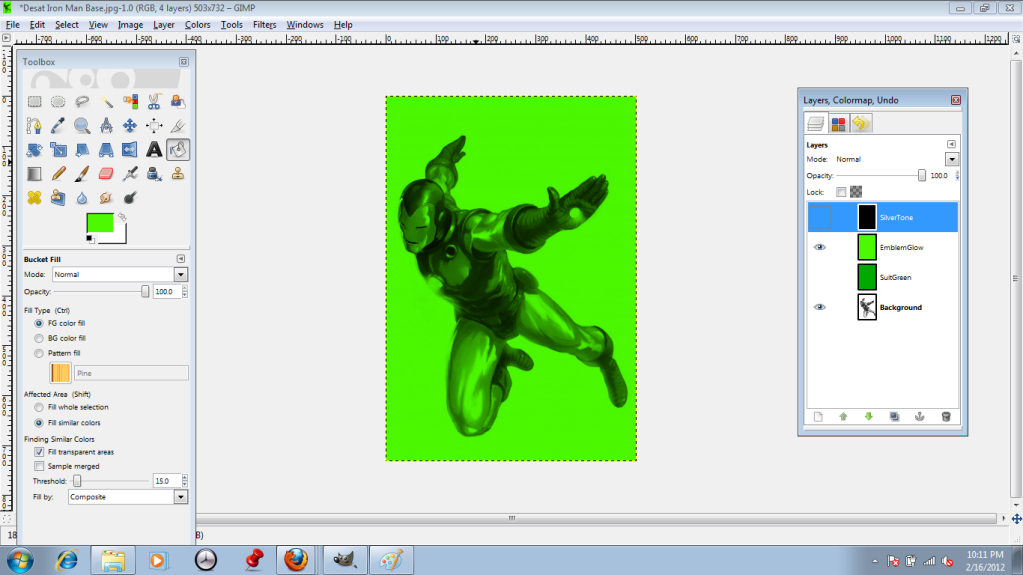
I don't want the whole image to be green, so I apply a "Layer Mask" to each layer. This option is located 8 down in the "Layers" menu. I go with the Full Transparency option, which lets me choose exactly where I want the color to show up.
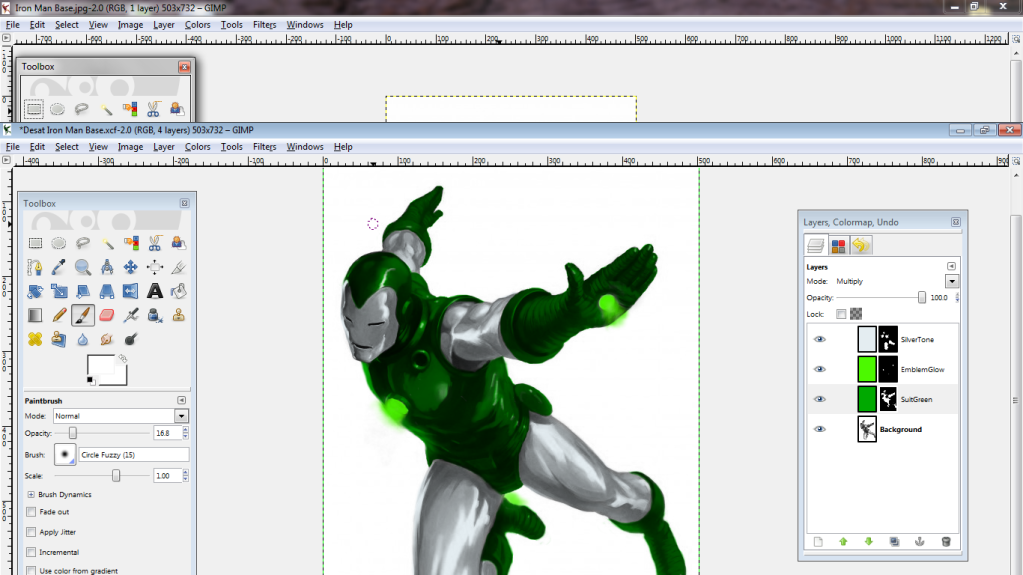
The layer mask is represented by the black box off to the right side of the layer icon (See below)
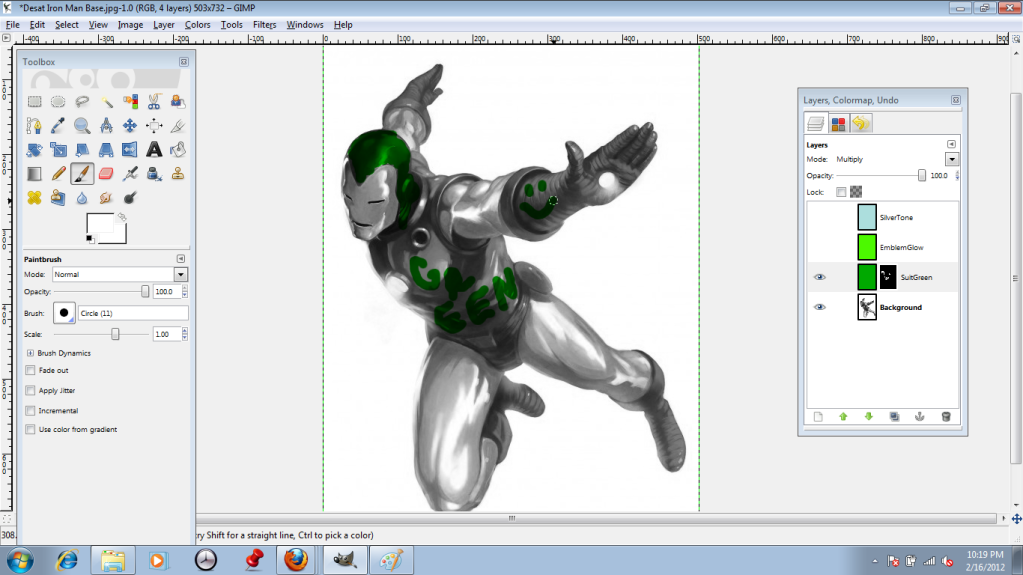
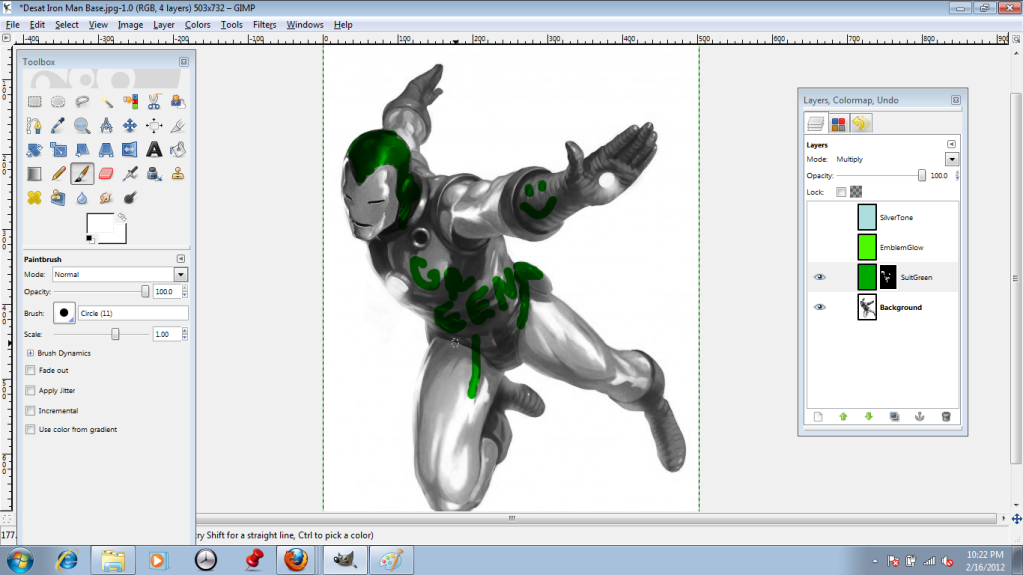
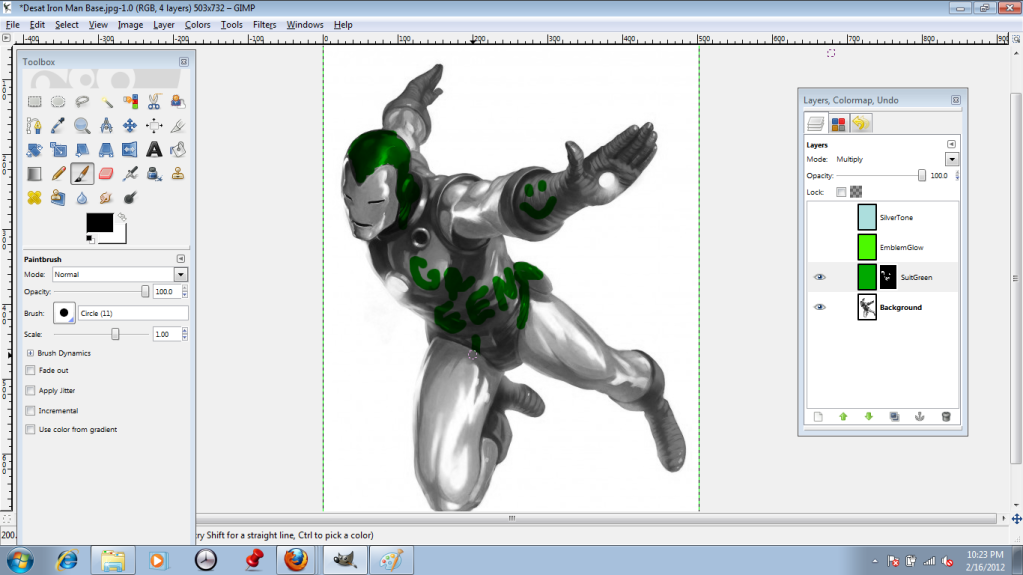
When using the layer mask, parts I paint with a "white" paintbrush show up, while parts I paint in "black" stay nice and invisible. I start out by using the bucket fill in black on the whole mask...
...and then paint in my chosen regions in "white."
Ooops! I went outside the lines!
Not to worry, though--I can just switch back to the black brush to fix it.
I repeat the process with each layer, getting it all juuuust right.
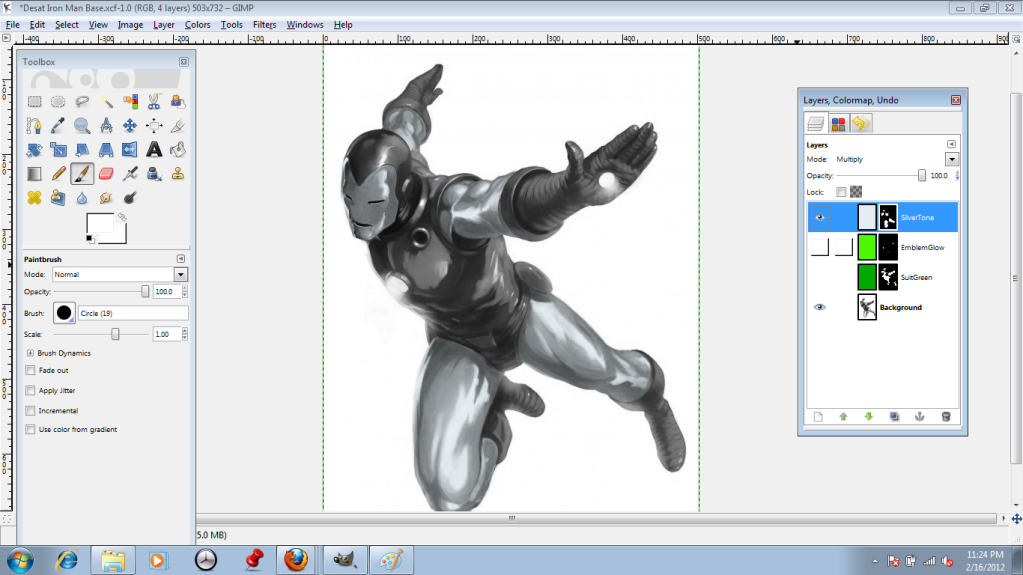
Finally, I use the eye icons to reveal each layer. Silvery-blue:
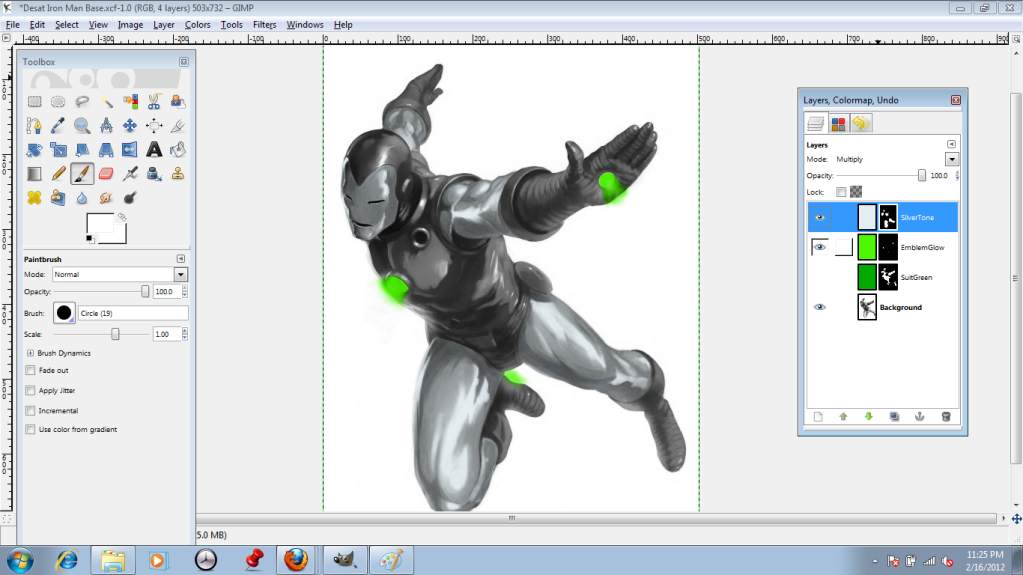
Glowing green... (This one involved a lot of playing around with brushes and opacity, so I could get those nice fuzzy areas. More on brushes later.)
And enamel green!
Perfect!
I save it as an .xcf file, which preserves the layers so I can play around with it more later. (Beware, Iron Lantern. I haven't finished with you yet!)
If I wanted to, say, print it out, I would save it as a .jpg or some other format which flattens the layers down.
Here is Iron Man, looking just as he should. Very subtle, guy.
Not for long, though! I don't want to just paint over him, because that would be annoying and I have no artistic talent. If I did, I could draw my own darn superheroes.
Instead, I'm going to desaturate him (turn the image black and white.) This option is located in the "Color" menu.
There are a few ways that GIMP can map the black and white; I choose to go with the Lightness option because it looks nice and sharp, and I don't want too much grey to interfere with the colors I put in later on.
I want to change the image by adding three new colors, so I'll be adding three new layers. I give them appropriate names so I can remember which I'm messing with.
Yeah, that dead black emptiness, like the uncaring void of space? That's not what I want to see. I switch all of the layers over to the "Multiply" setting.
I also click on the little eyeball icons so that I can work on one layer at a time.
On "Multiply" the layers are kind of like sheets of colored cellophane laid over the image; they add color but are transparent. Obviously this doesn't help when they're black, but once I pick a bright green...
I don't want the whole image to be green, so I apply a "Layer Mask" to each layer. This option is located 8 down in the "Layers" menu. I go with the Full Transparency option, which lets me choose exactly where I want the color to show up.
The layer mask is represented by the black box off to the right side of the layer icon (See below)
When using the layer mask, parts I paint with a "white" paintbrush show up, while parts I paint in "black" stay nice and invisible. I start out by using the bucket fill in black on the whole mask...
...and then paint in my chosen regions in "white."
Ooops! I went outside the lines!
Not to worry, though--I can just switch back to the black brush to fix it.
I repeat the process with each layer, getting it all juuuust right.
Finally, I use the eye icons to reveal each layer. Silvery-blue:
Glowing green... (This one involved a lot of playing around with brushes and opacity, so I could get those nice fuzzy areas. More on brushes later.)
And enamel green!
Perfect!
I save it as an .xcf file, which preserves the layers so I can play around with it more later. (Beware, Iron Lantern. I haven't finished with you yet!)
If I wanted to, say, print it out, I would save it as a .jpg or some other format which flattens the layers down.
Subscribe to:
Posts (Atom)